
From Lightbulbs to Light Panels: How My Stained Glass Patterns Evolved
"For us, learning the way light and glass work together has been truly rewarding. Glass is performance art…from its fluidity to the way it scatters light in space." —Thomas Phifer
2012-2013 – Learning the Art of Stained Glass
The summer of 2012 was a season of possibilities. Having finished a stained glass class at my local community college in the Southwest Suburbs of Chicago, I was eager to expand on that knowledge with my own projects. My skills were basic, but my ambition had greater expectations. What would I make next?
As a seasoned mechanical designer, I had one advantage: AutoCAD. I could create my own patterns, print them at full-scale and go from there. No more hand-tracing over copies of patterns like I had done in class. I dabbled with pattern books but found them less exciting than creating my own designs.
My first pattern consisted of a simple star in a circle. It became the first suncatcher I’ve made outside of class and it turned out quite well for a novice. The next pattern, however, was a very bland, diamond-shaped suncatcher paired with glass choices that simply didn’t work together. I didn’t let it stop me. I kept experimenting. I made a simple candle surround, followed by a long, narrow panel designed to resemble a transom window that I hung in my cubicle at work.
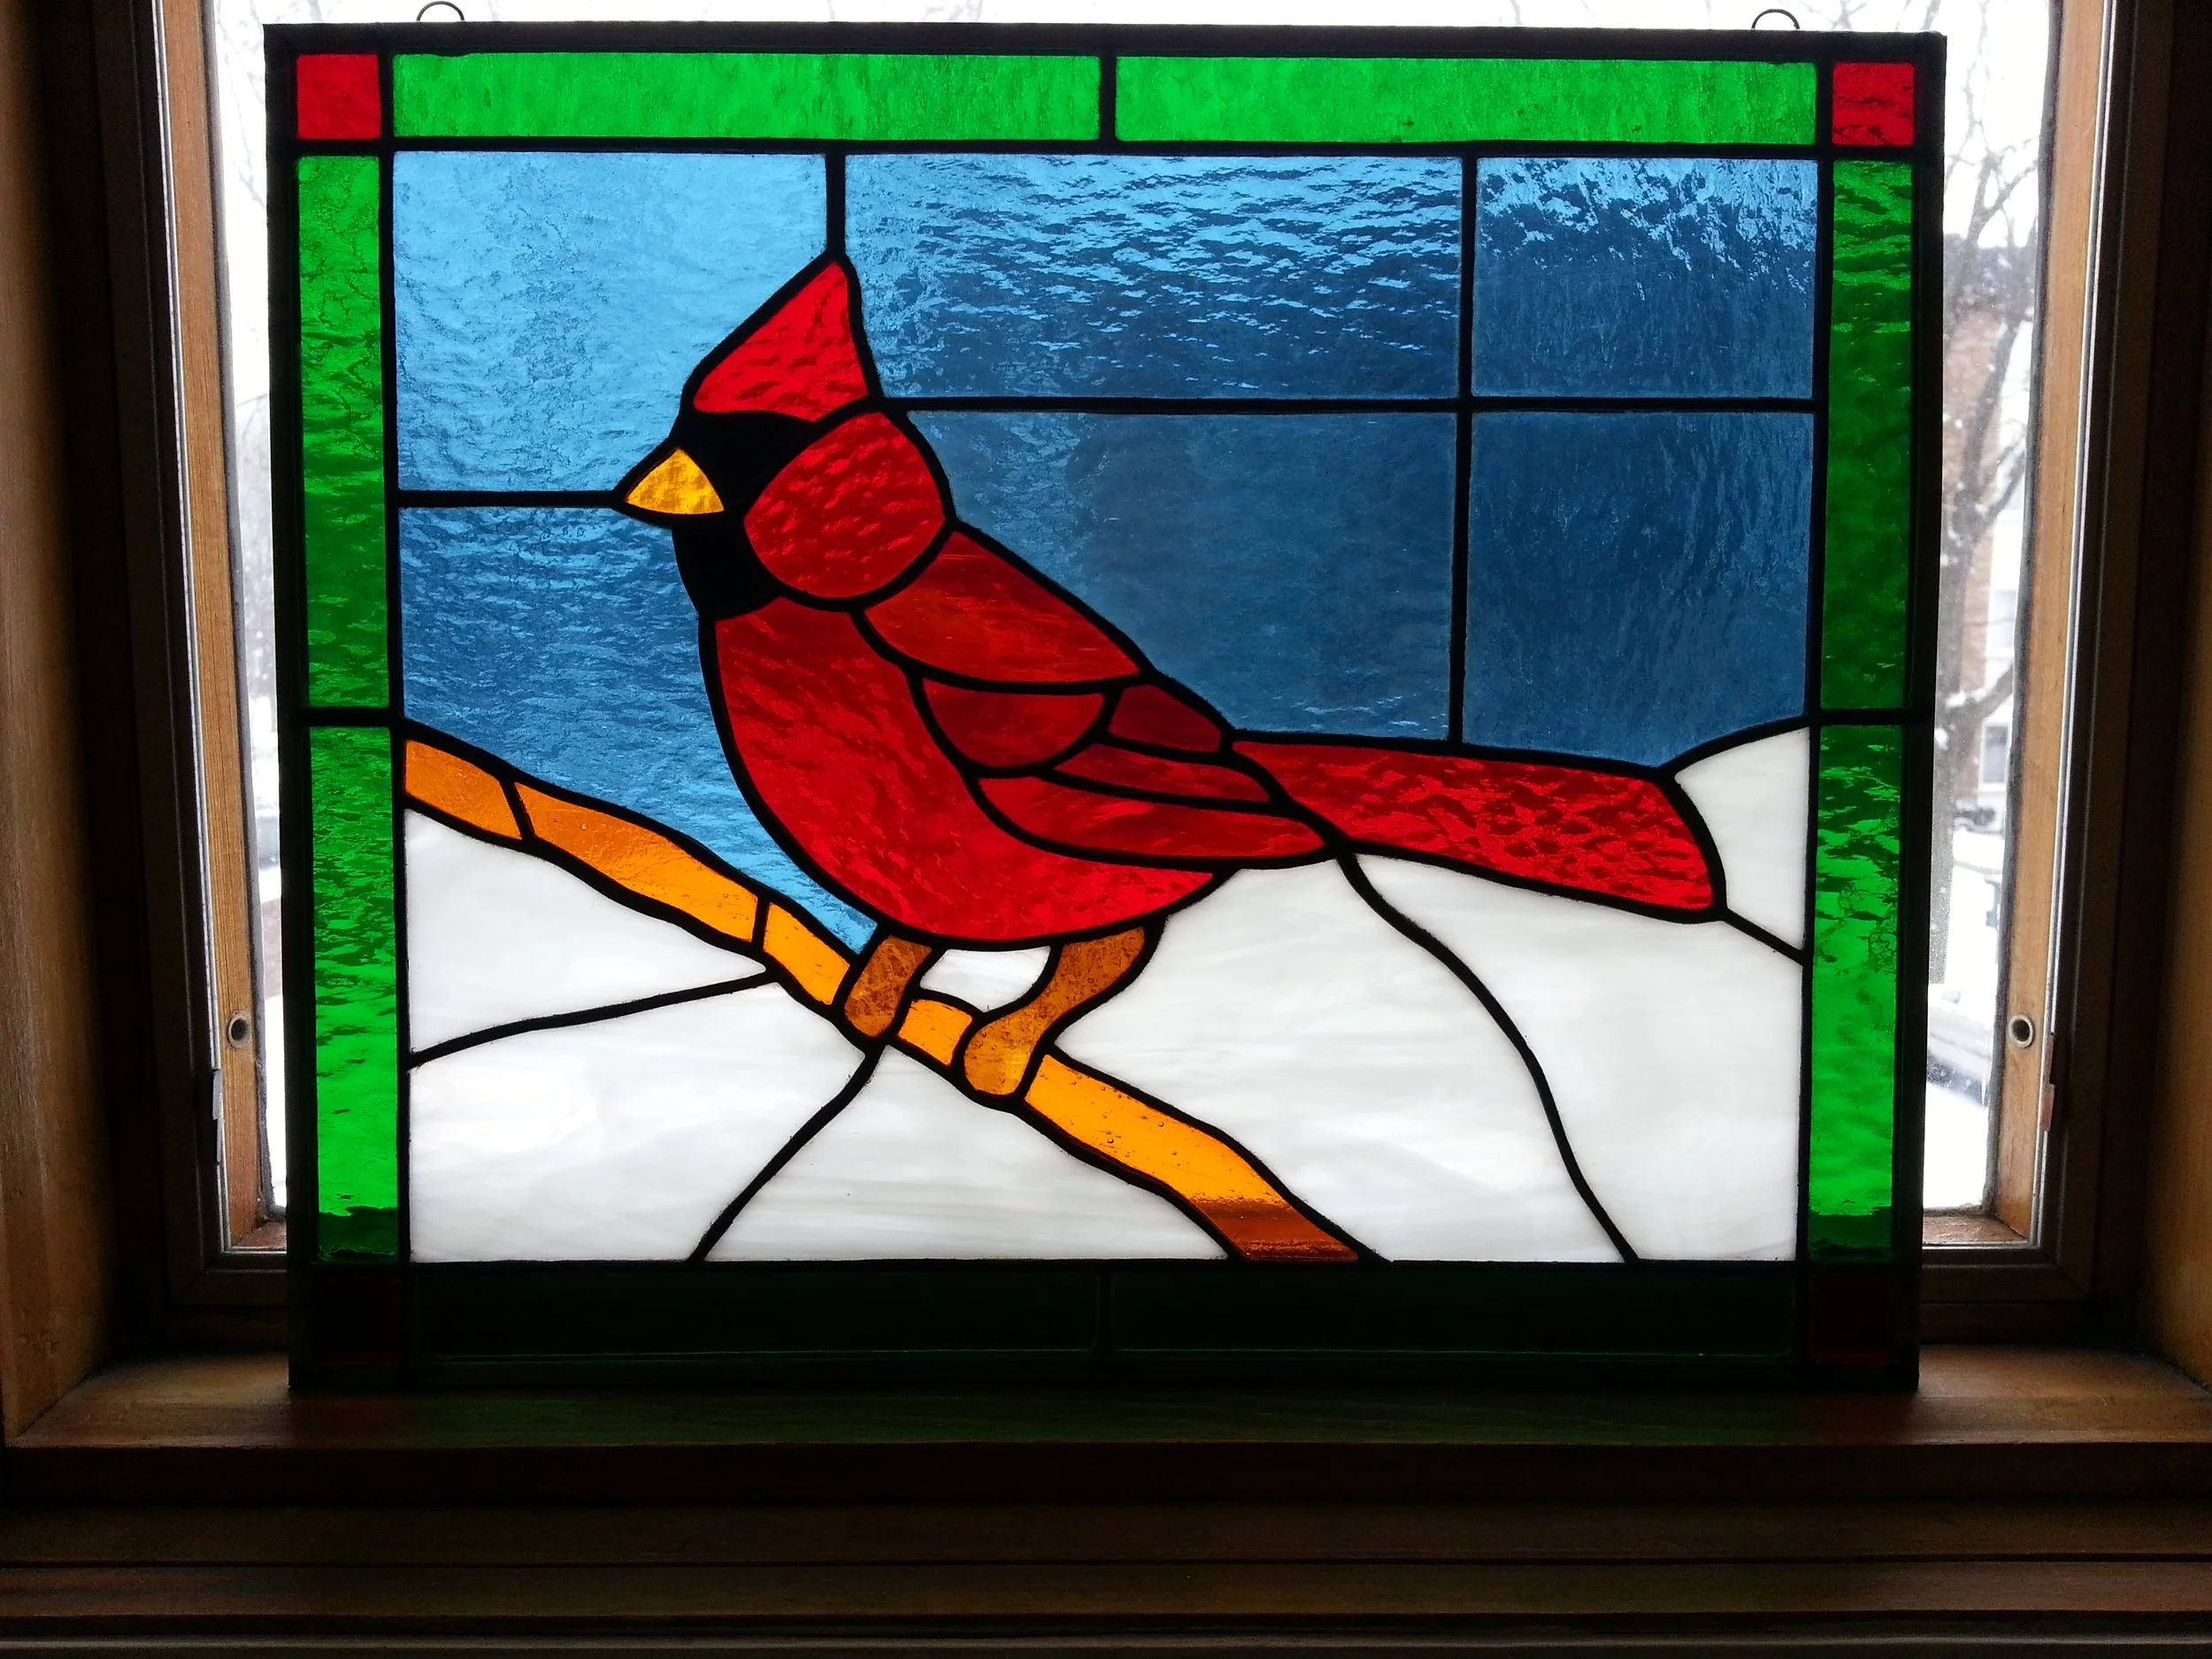
By that fall, I was ready to take on more complex shapes and patterns. I found a cardinal pattern online, redrew it in CAD, and modified it. I added a backdrop of sky over a snowy background, and a border around the scene. I also had to determine where additional solder joints should be placed outside the bird for strength and balance. It was the best I could do at the time.
I also began experimenting with glass selection. Rather than making the cardinal from a single shade of red glass, I used darker red glass mixed with hints of amber at the tips of the wings. Subtle gradients in glass selection can add structure and depth to a piece.
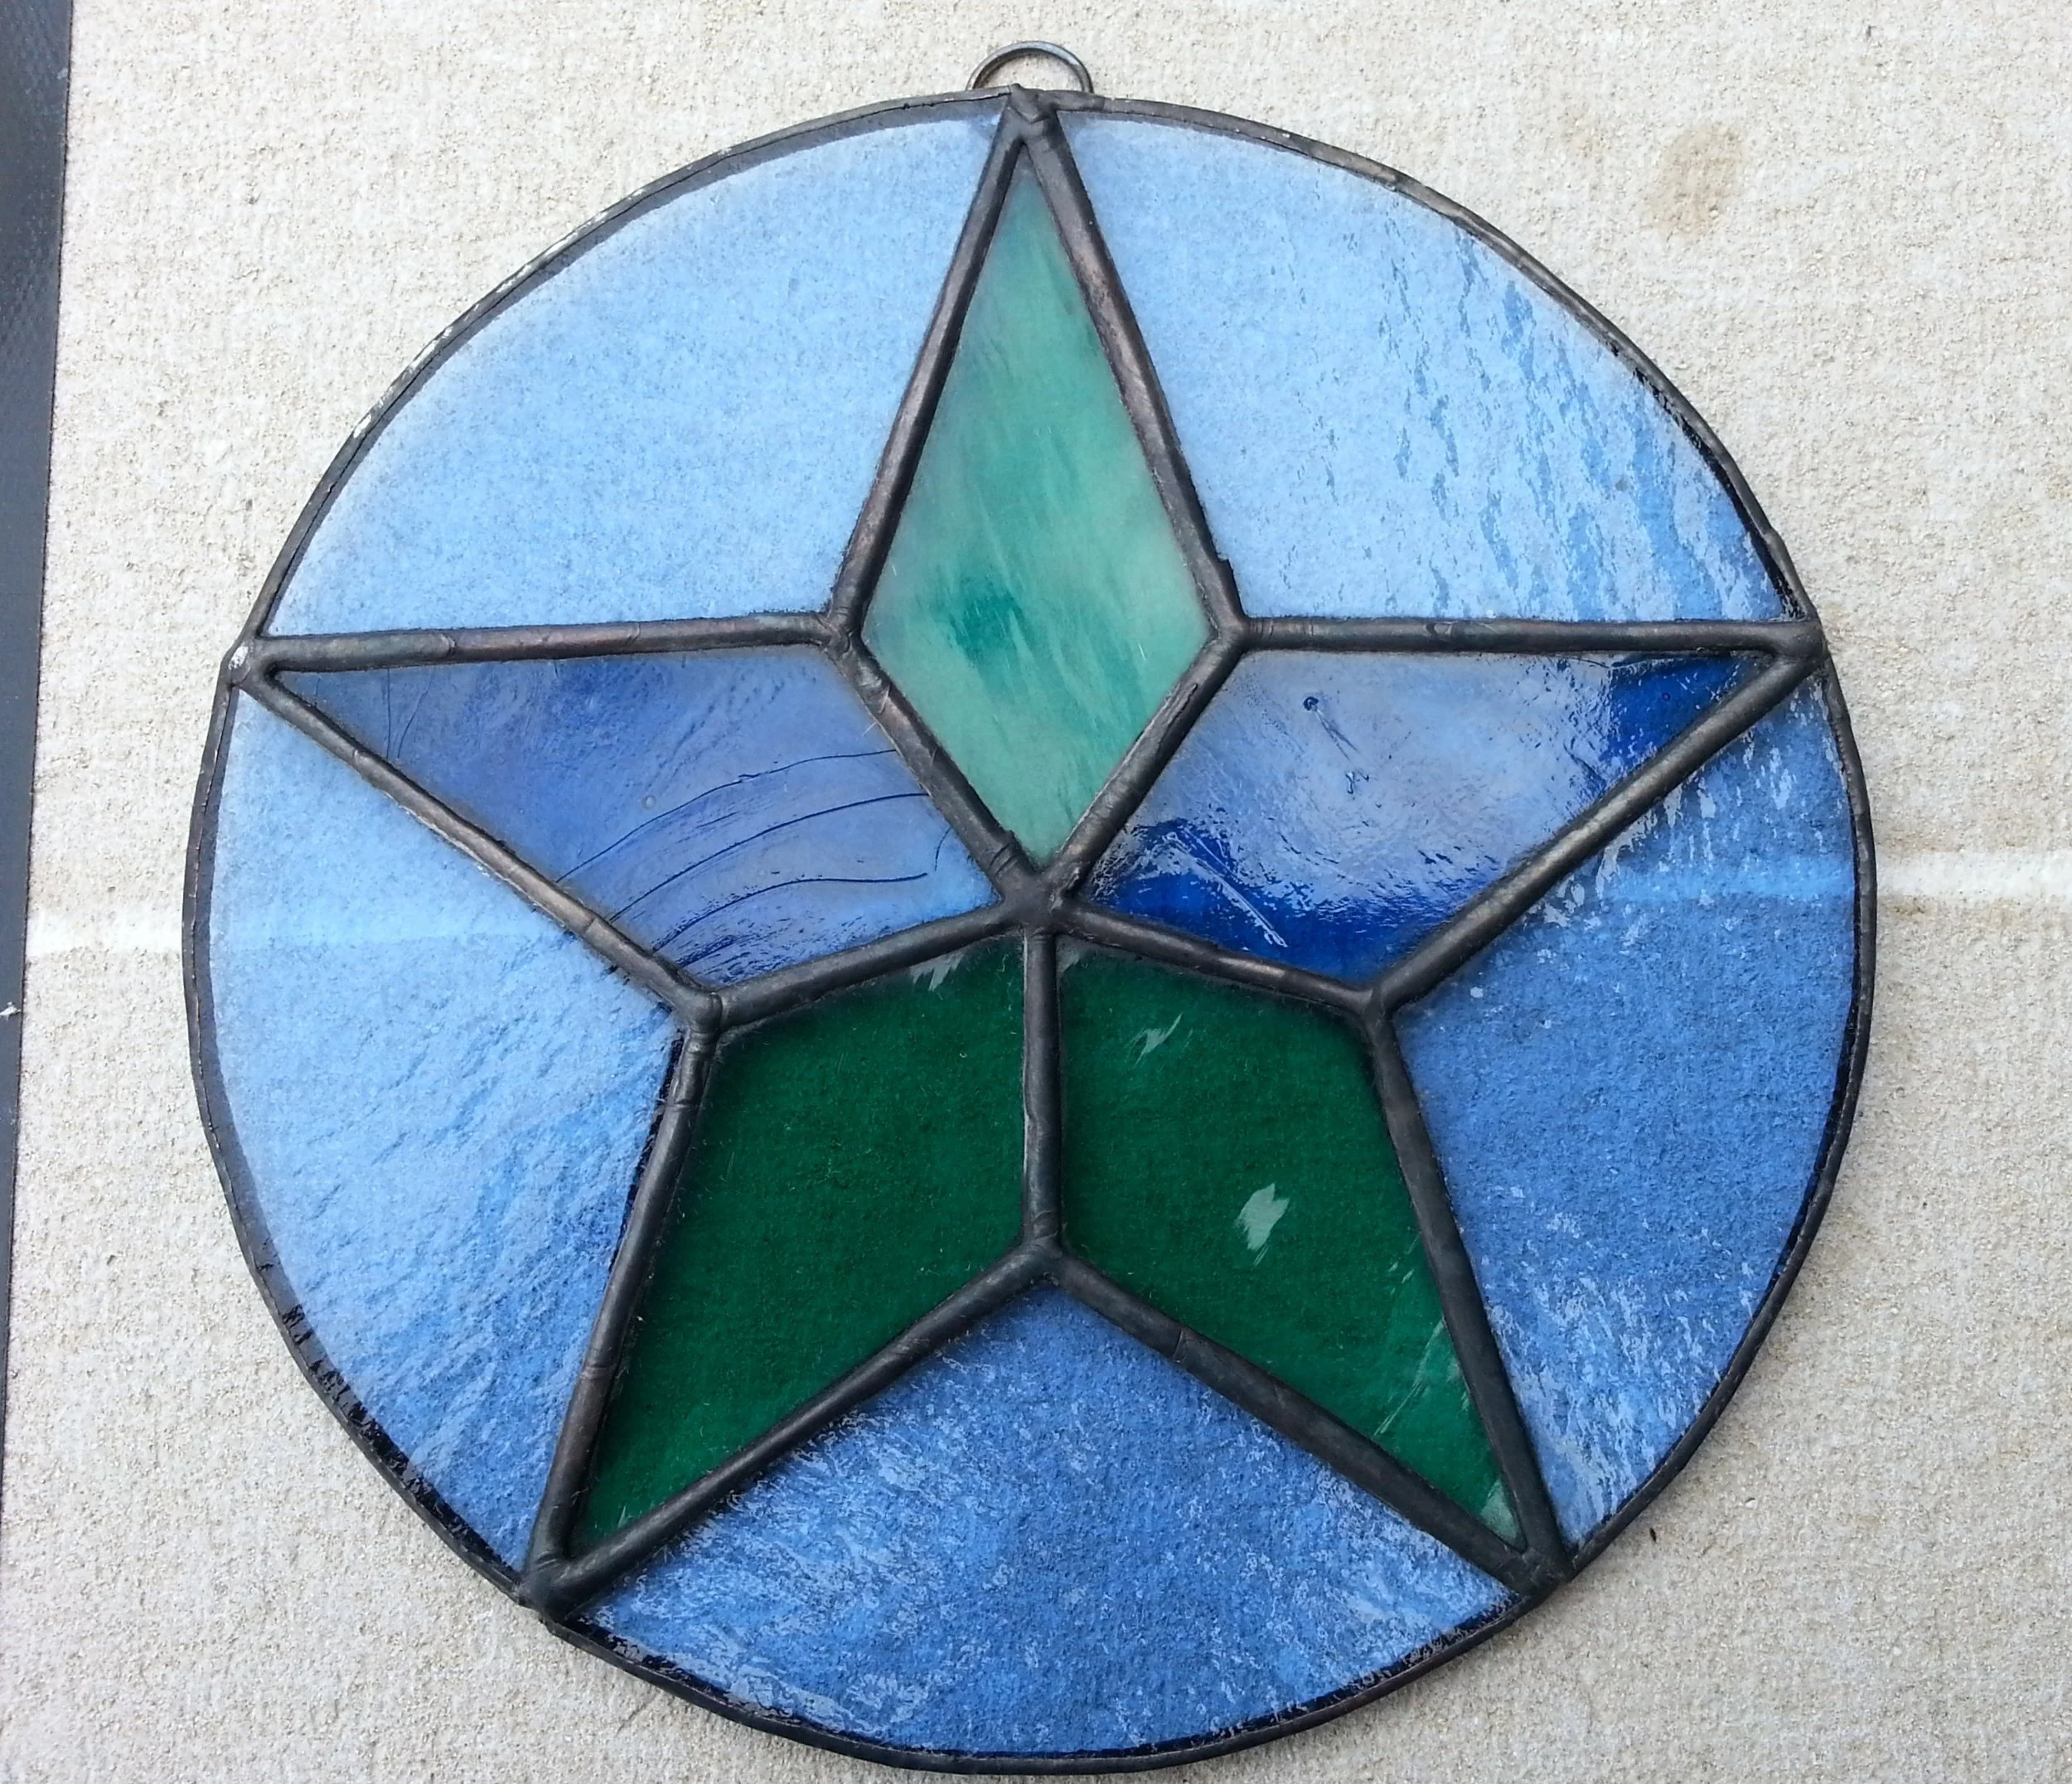
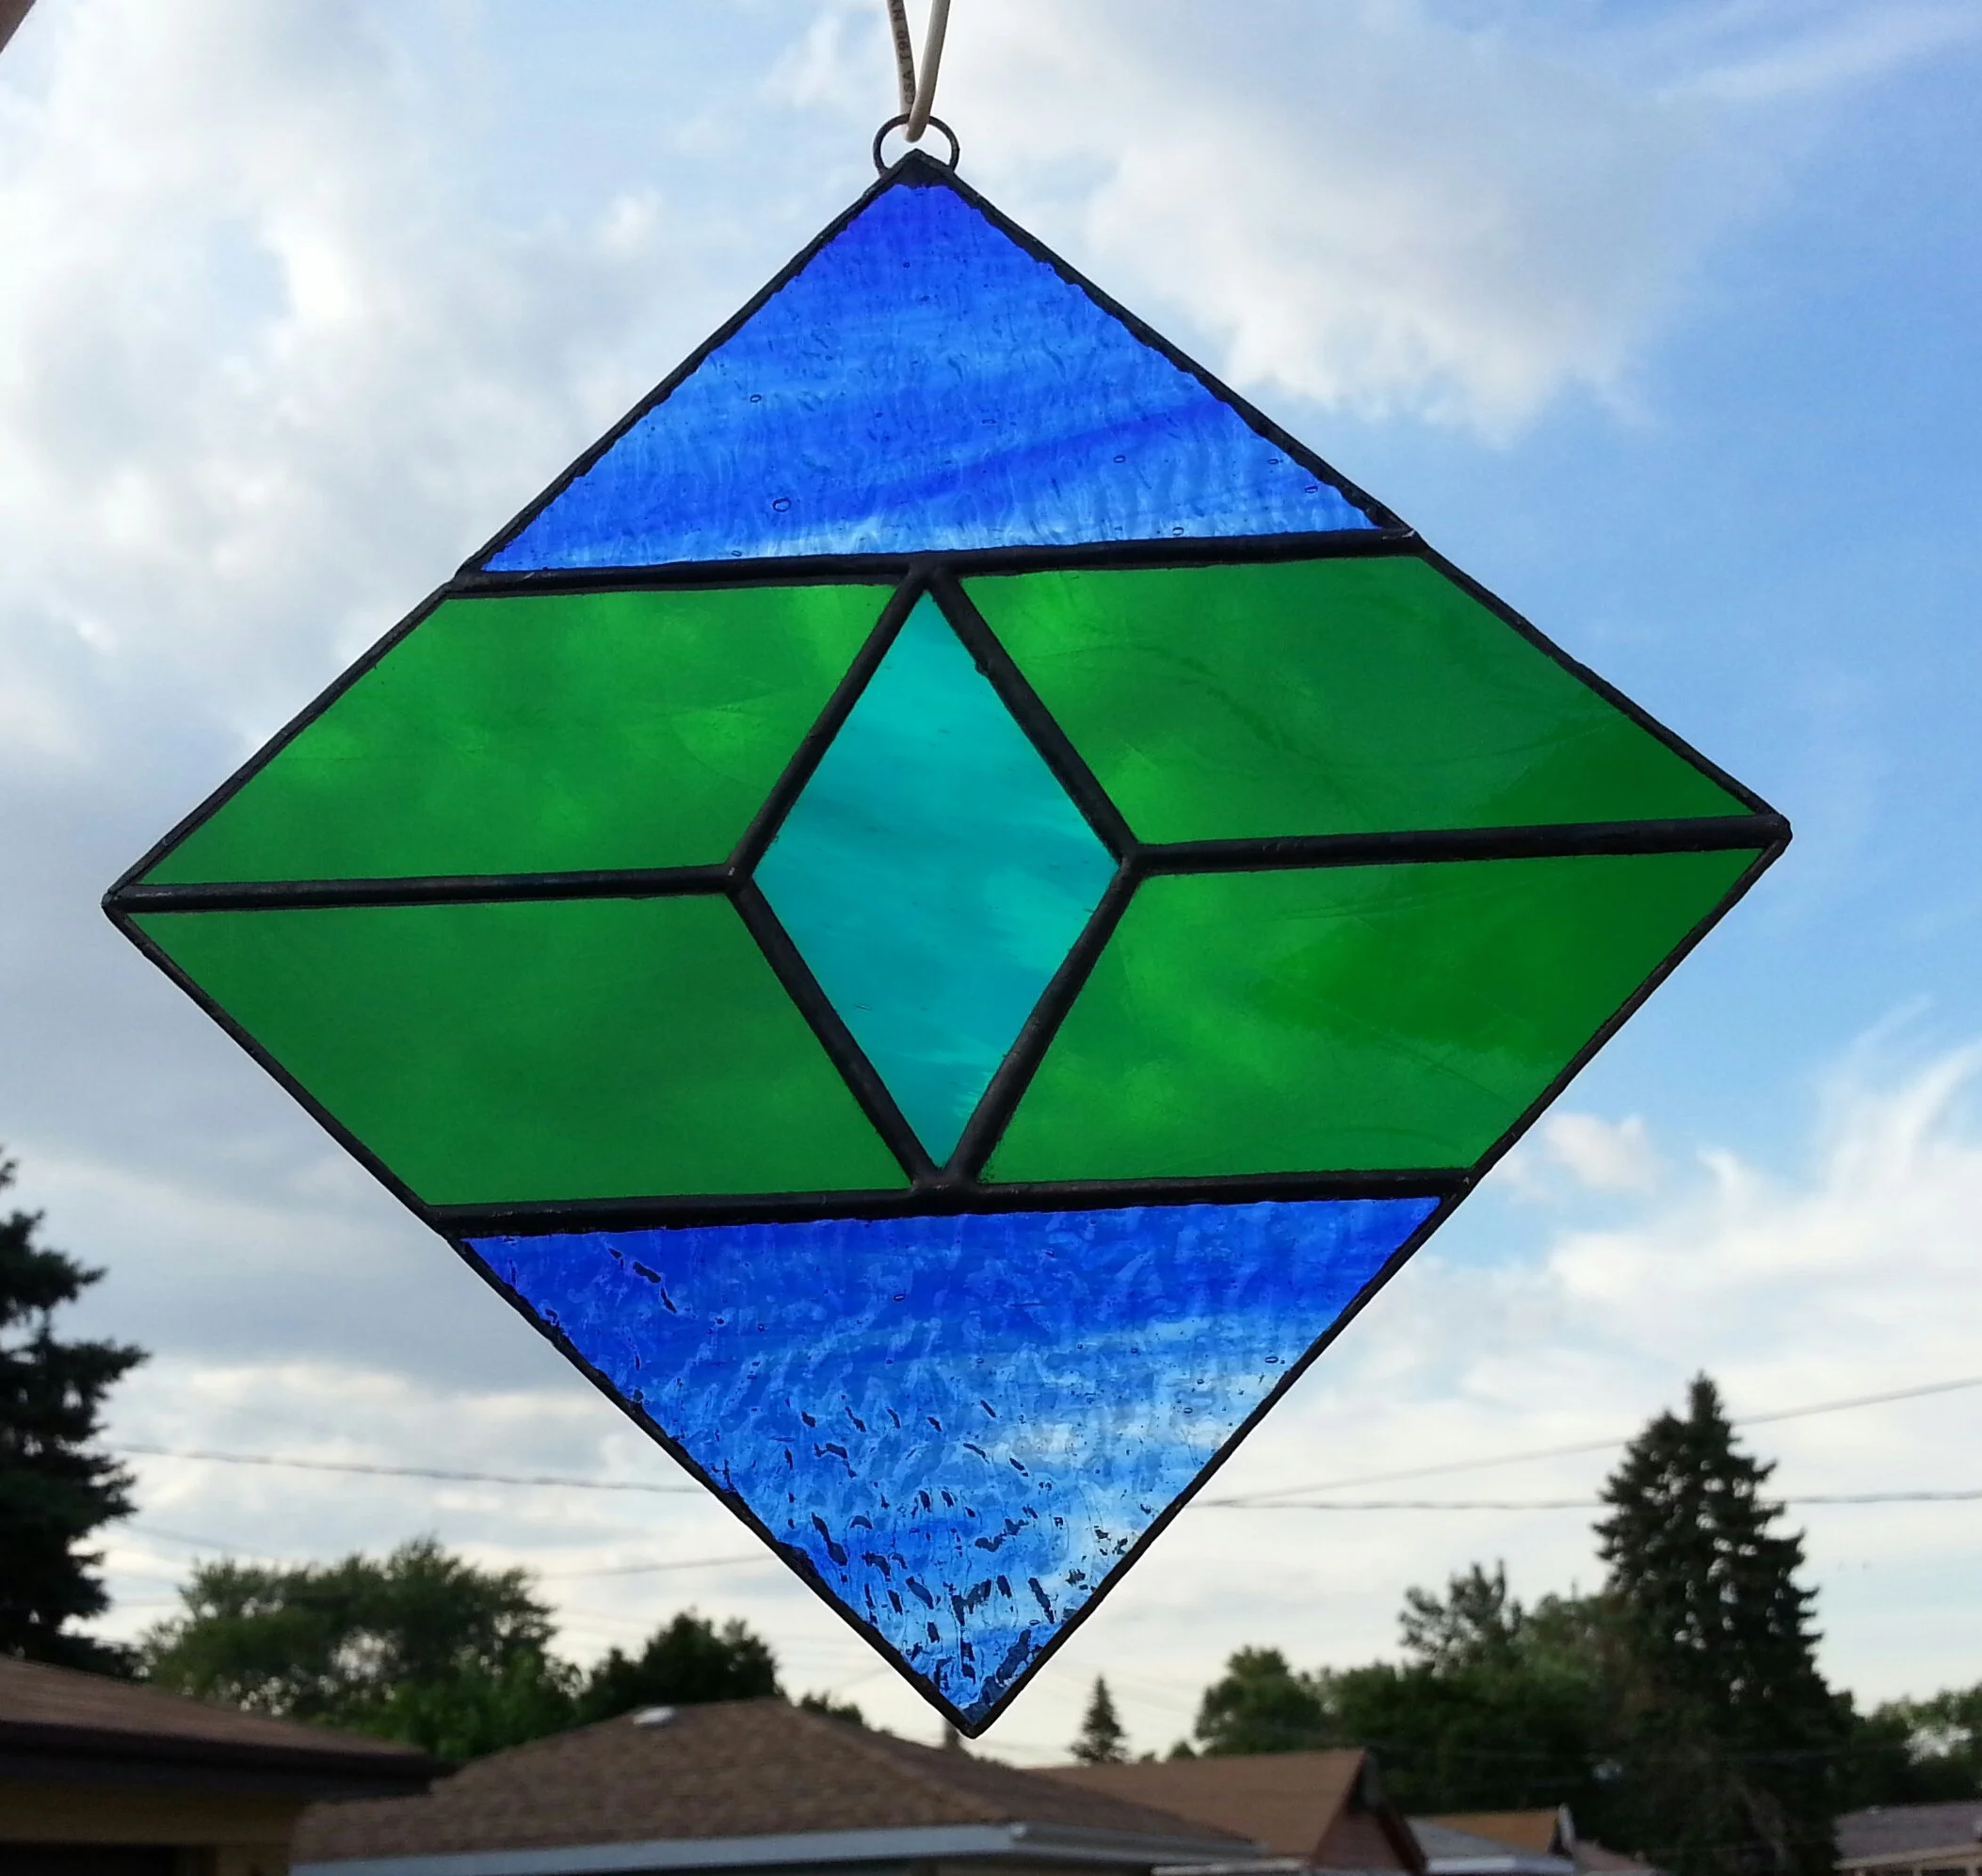
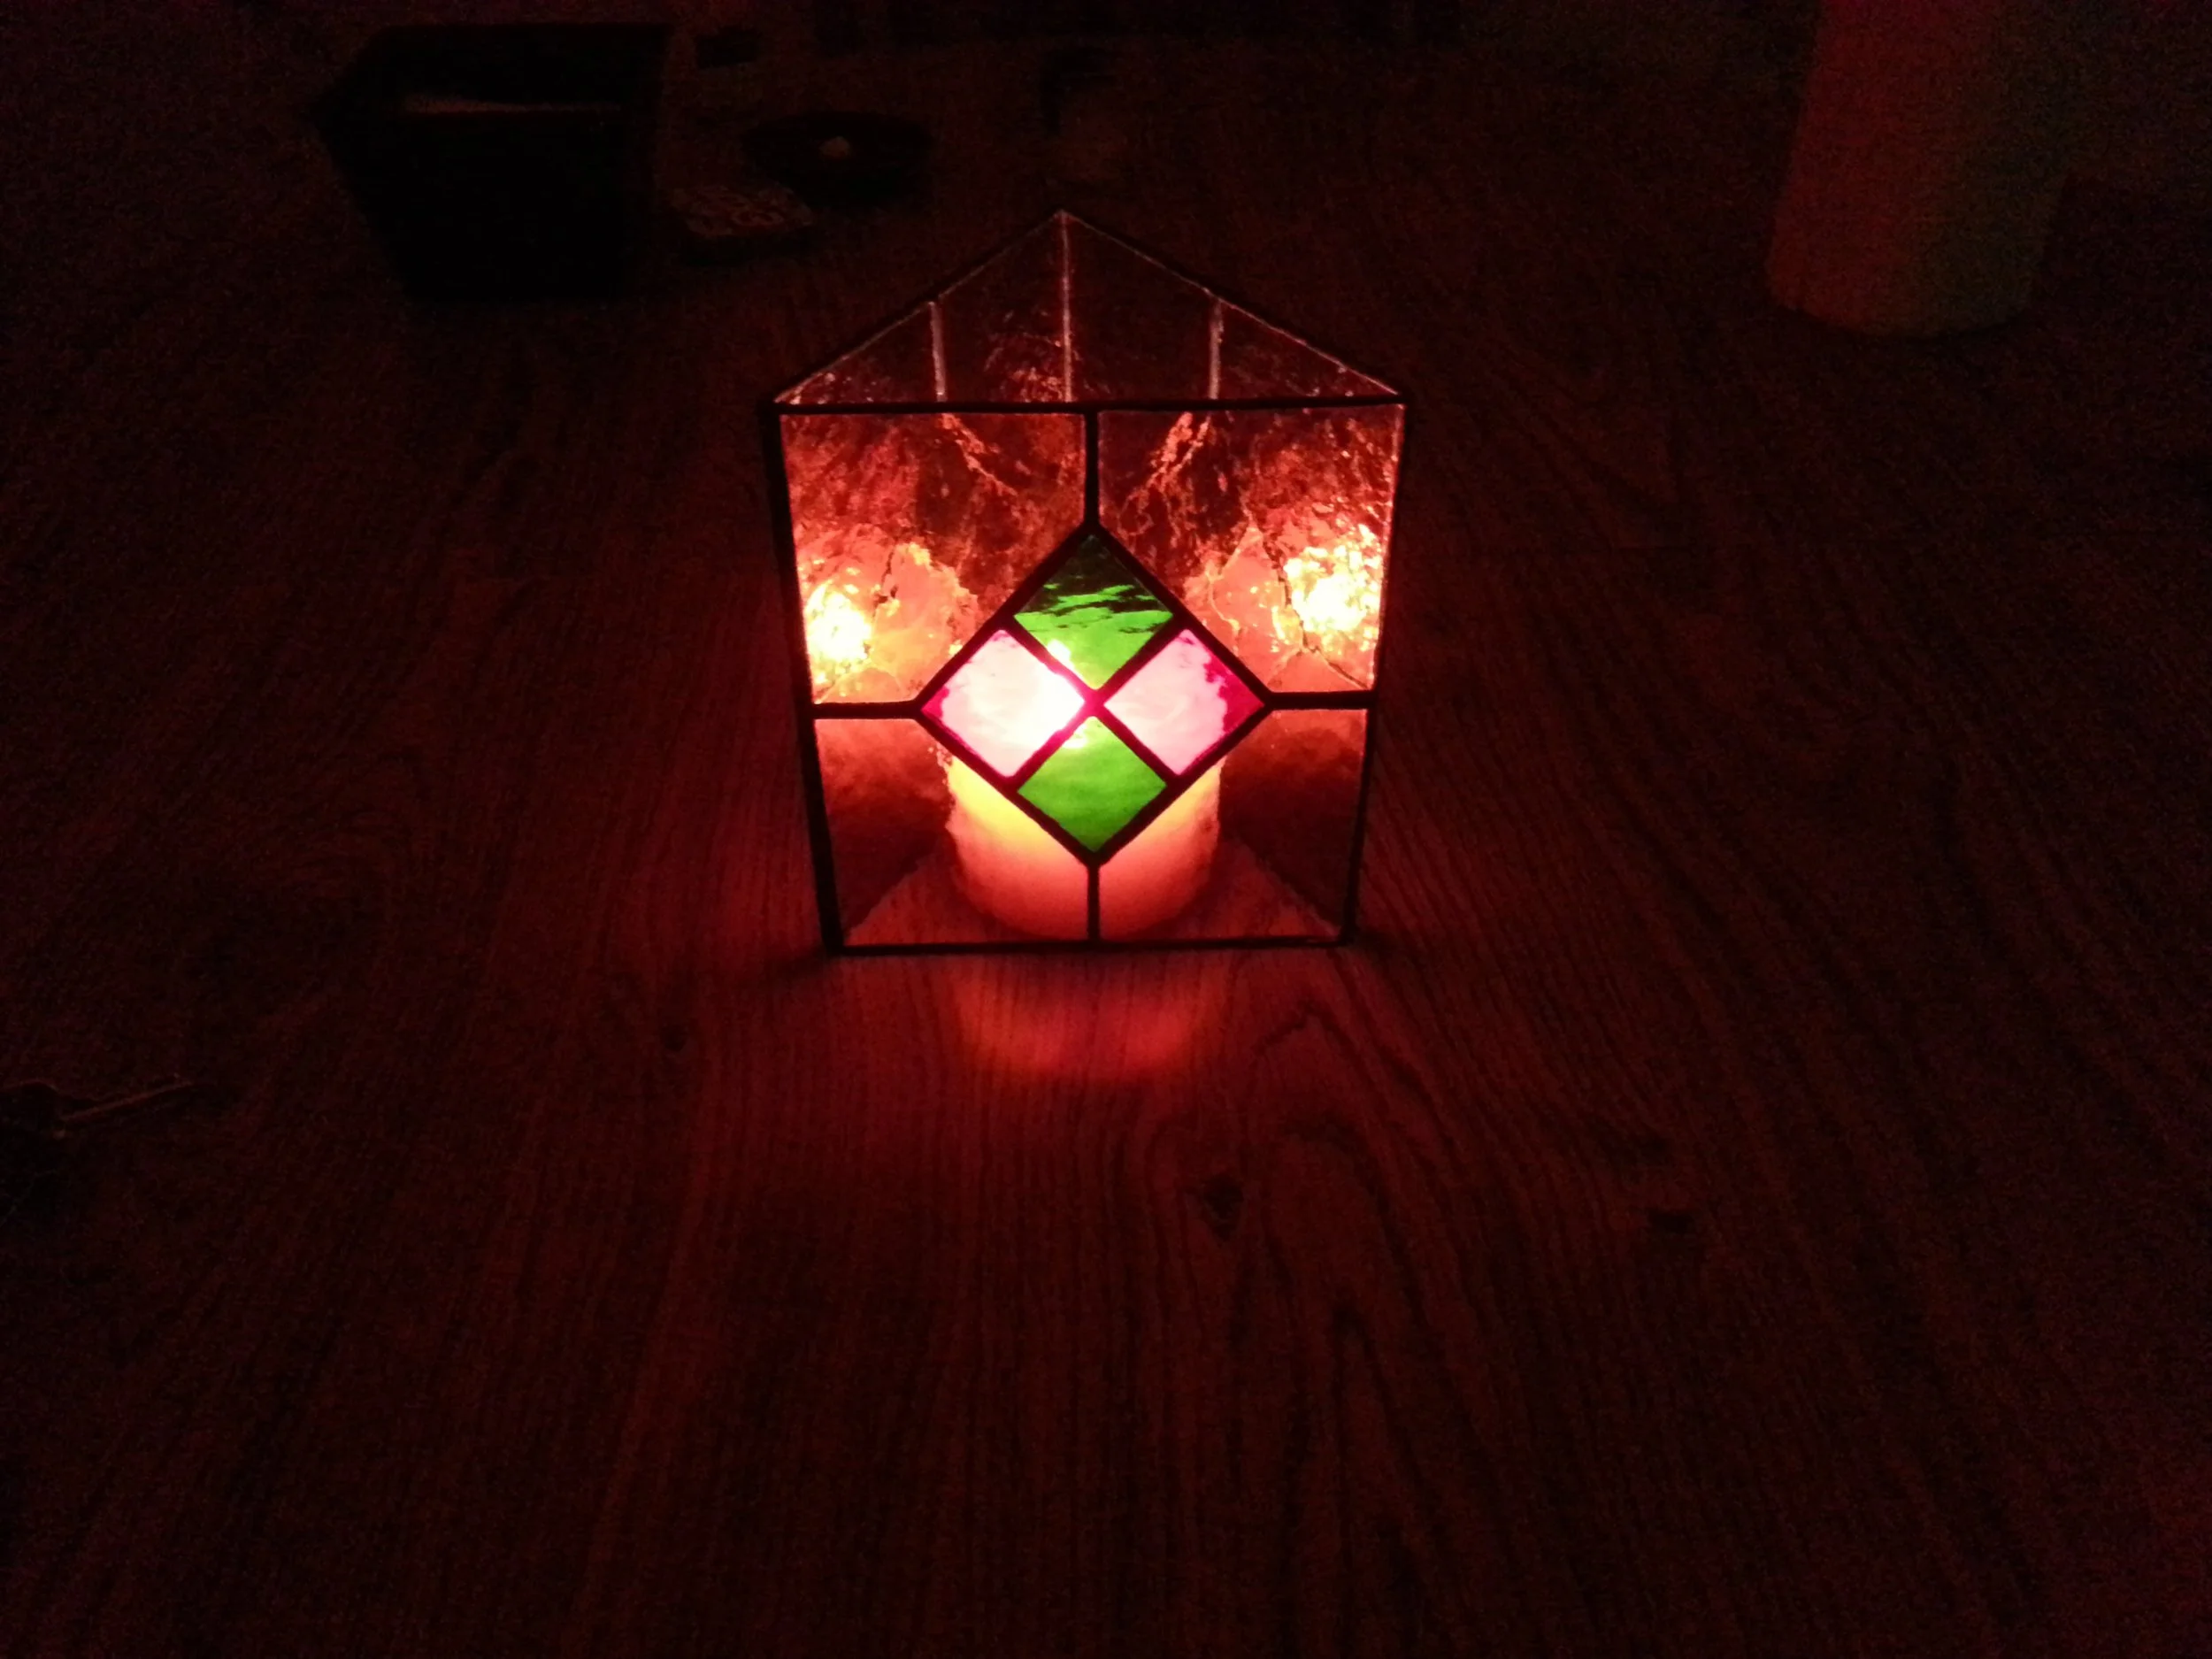
Early stained glass pieces from 2012–2013 (left to right, top to bottom): the star suncatcher (my first project outside of class), the diamond-shaped suncatcher, my first candle surround, the transom-style panel I hung in my cubicle at work, and the cardinal panel.
2013-2016 – Further Explorations in Design
Next, I decided to try something bold. Why not create something out of pop culture? Who would be a cooler subject than Darth Vader?
It was my first attempt to create a pattern from a real picture rather than from basic geometric shapes or existing stained glass patterns. I searched the internet for an image that would translate well for the medium. Not every image works for stained glass. The best translations depend on clear images and angles that yield large, clean glass pieces rather than too many fine details that could overcomplicate the pattern.
I would import the image into CAD where I would trace the major outlines. This is to maintain scale and proportion during the translation process. Then I would scale the entire sketch to a size you can realistically work with. From there, I sketched the remaining features to refine them, simplifying shapes and added solder lines and intersections where needed. I tried to use these solder lines intentionally—working with the geometry to suggest depth and structure.
Such a task takes practice and it could still be challenging at times.
When using a real image as a base, there is often far more detail available than stained glass can comfortably support. Too many literal outlines can quickly turn into a tangled matrix of solder lines. Instead, the goal is to simplify the image and allow the solder lines to suggest features rather than define every edge. After all, those lines should complement the glass, not overpower the piece.
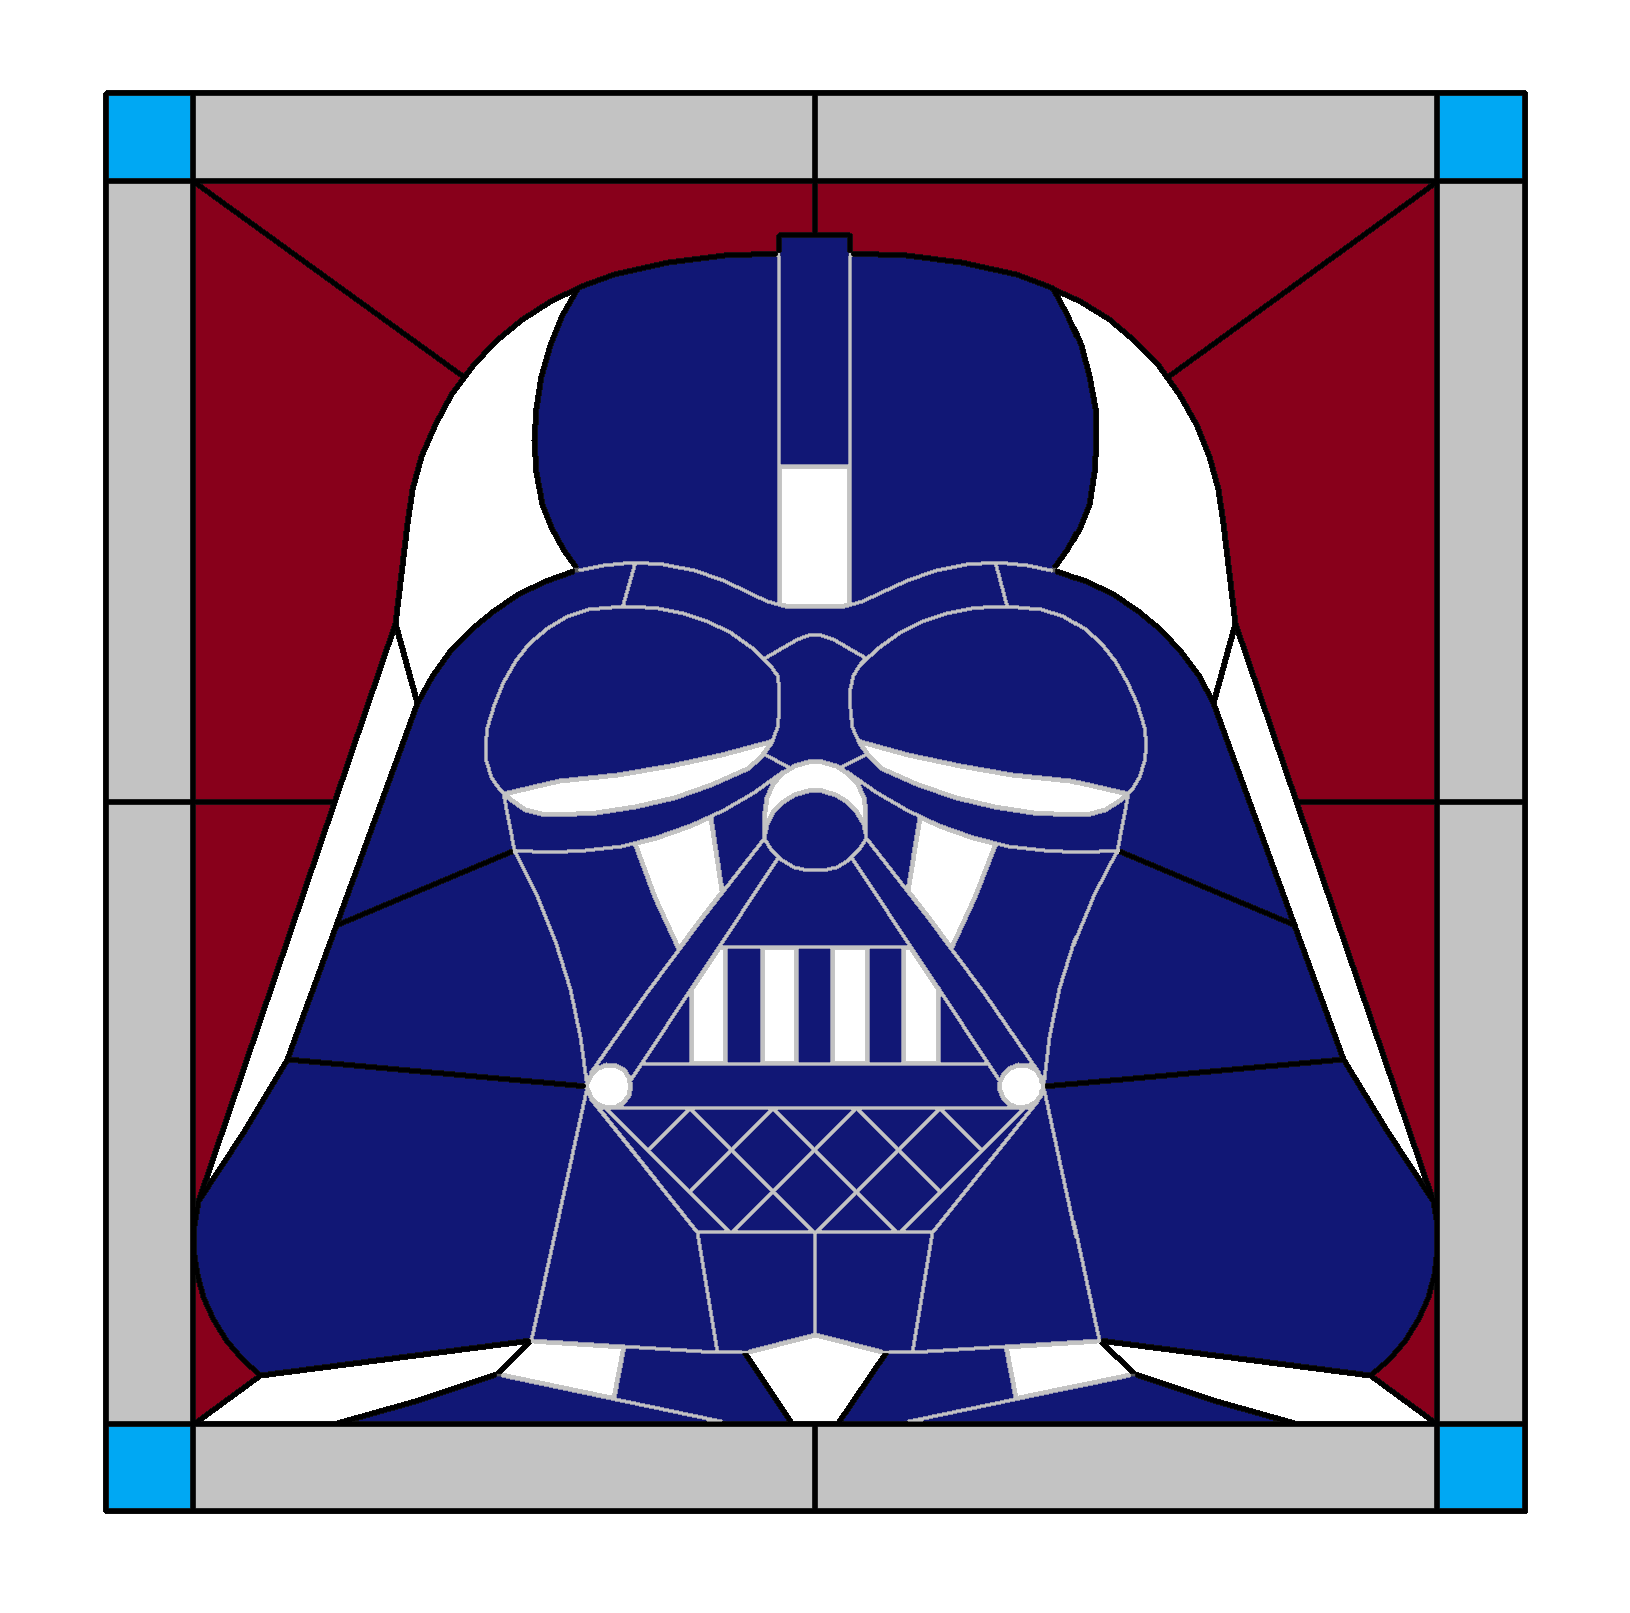
This was the result of my Darth Vader pattern experiment. The panel itself was never created, and if it had been, I would not have sold it for obvious legal reasons. Notice the grey “solder lines” versus the darker ones in this rendering—I planned to apply black patina to certain joints while leaving others raw to suggest the reflective surfaces of the helmet. I also chose dark blue instead of black glass so the design would stand out more when placed in a window.
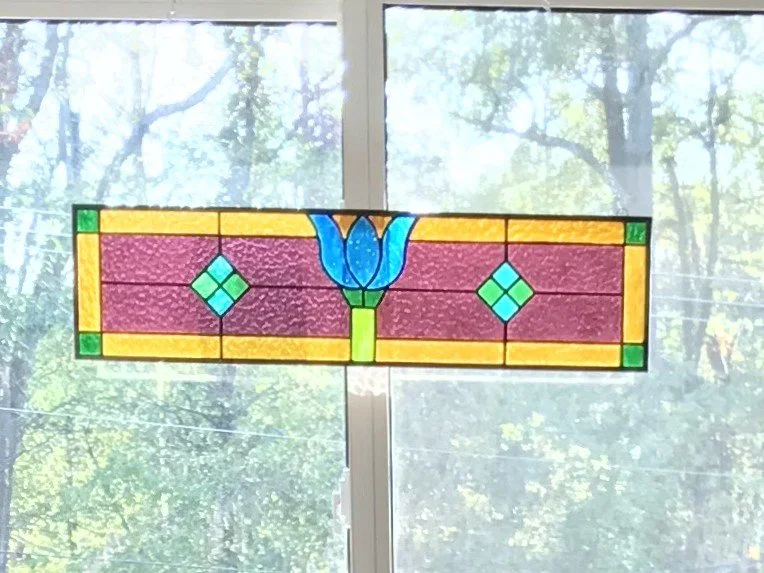
The years from 2014 to 2016 were very busy at work, so it wasn’t a particularly productive period for pattern design. I made a goldfinch suncatcher from another pattern I found online, but I also designed a tulip pattern during a quieter moment that I still like today.
The tulip design introduced a theme that would appear in many of my later patterns: textured colored glass paired with textured clear glass. The combination creates a balanced, modern look while the motif itself retains an antique character. Notice how the solder joints follow the structural biology of the flower, giving the design a realistic sense of depth. Applying different shades of green to the leaves yields further dimensional depth.
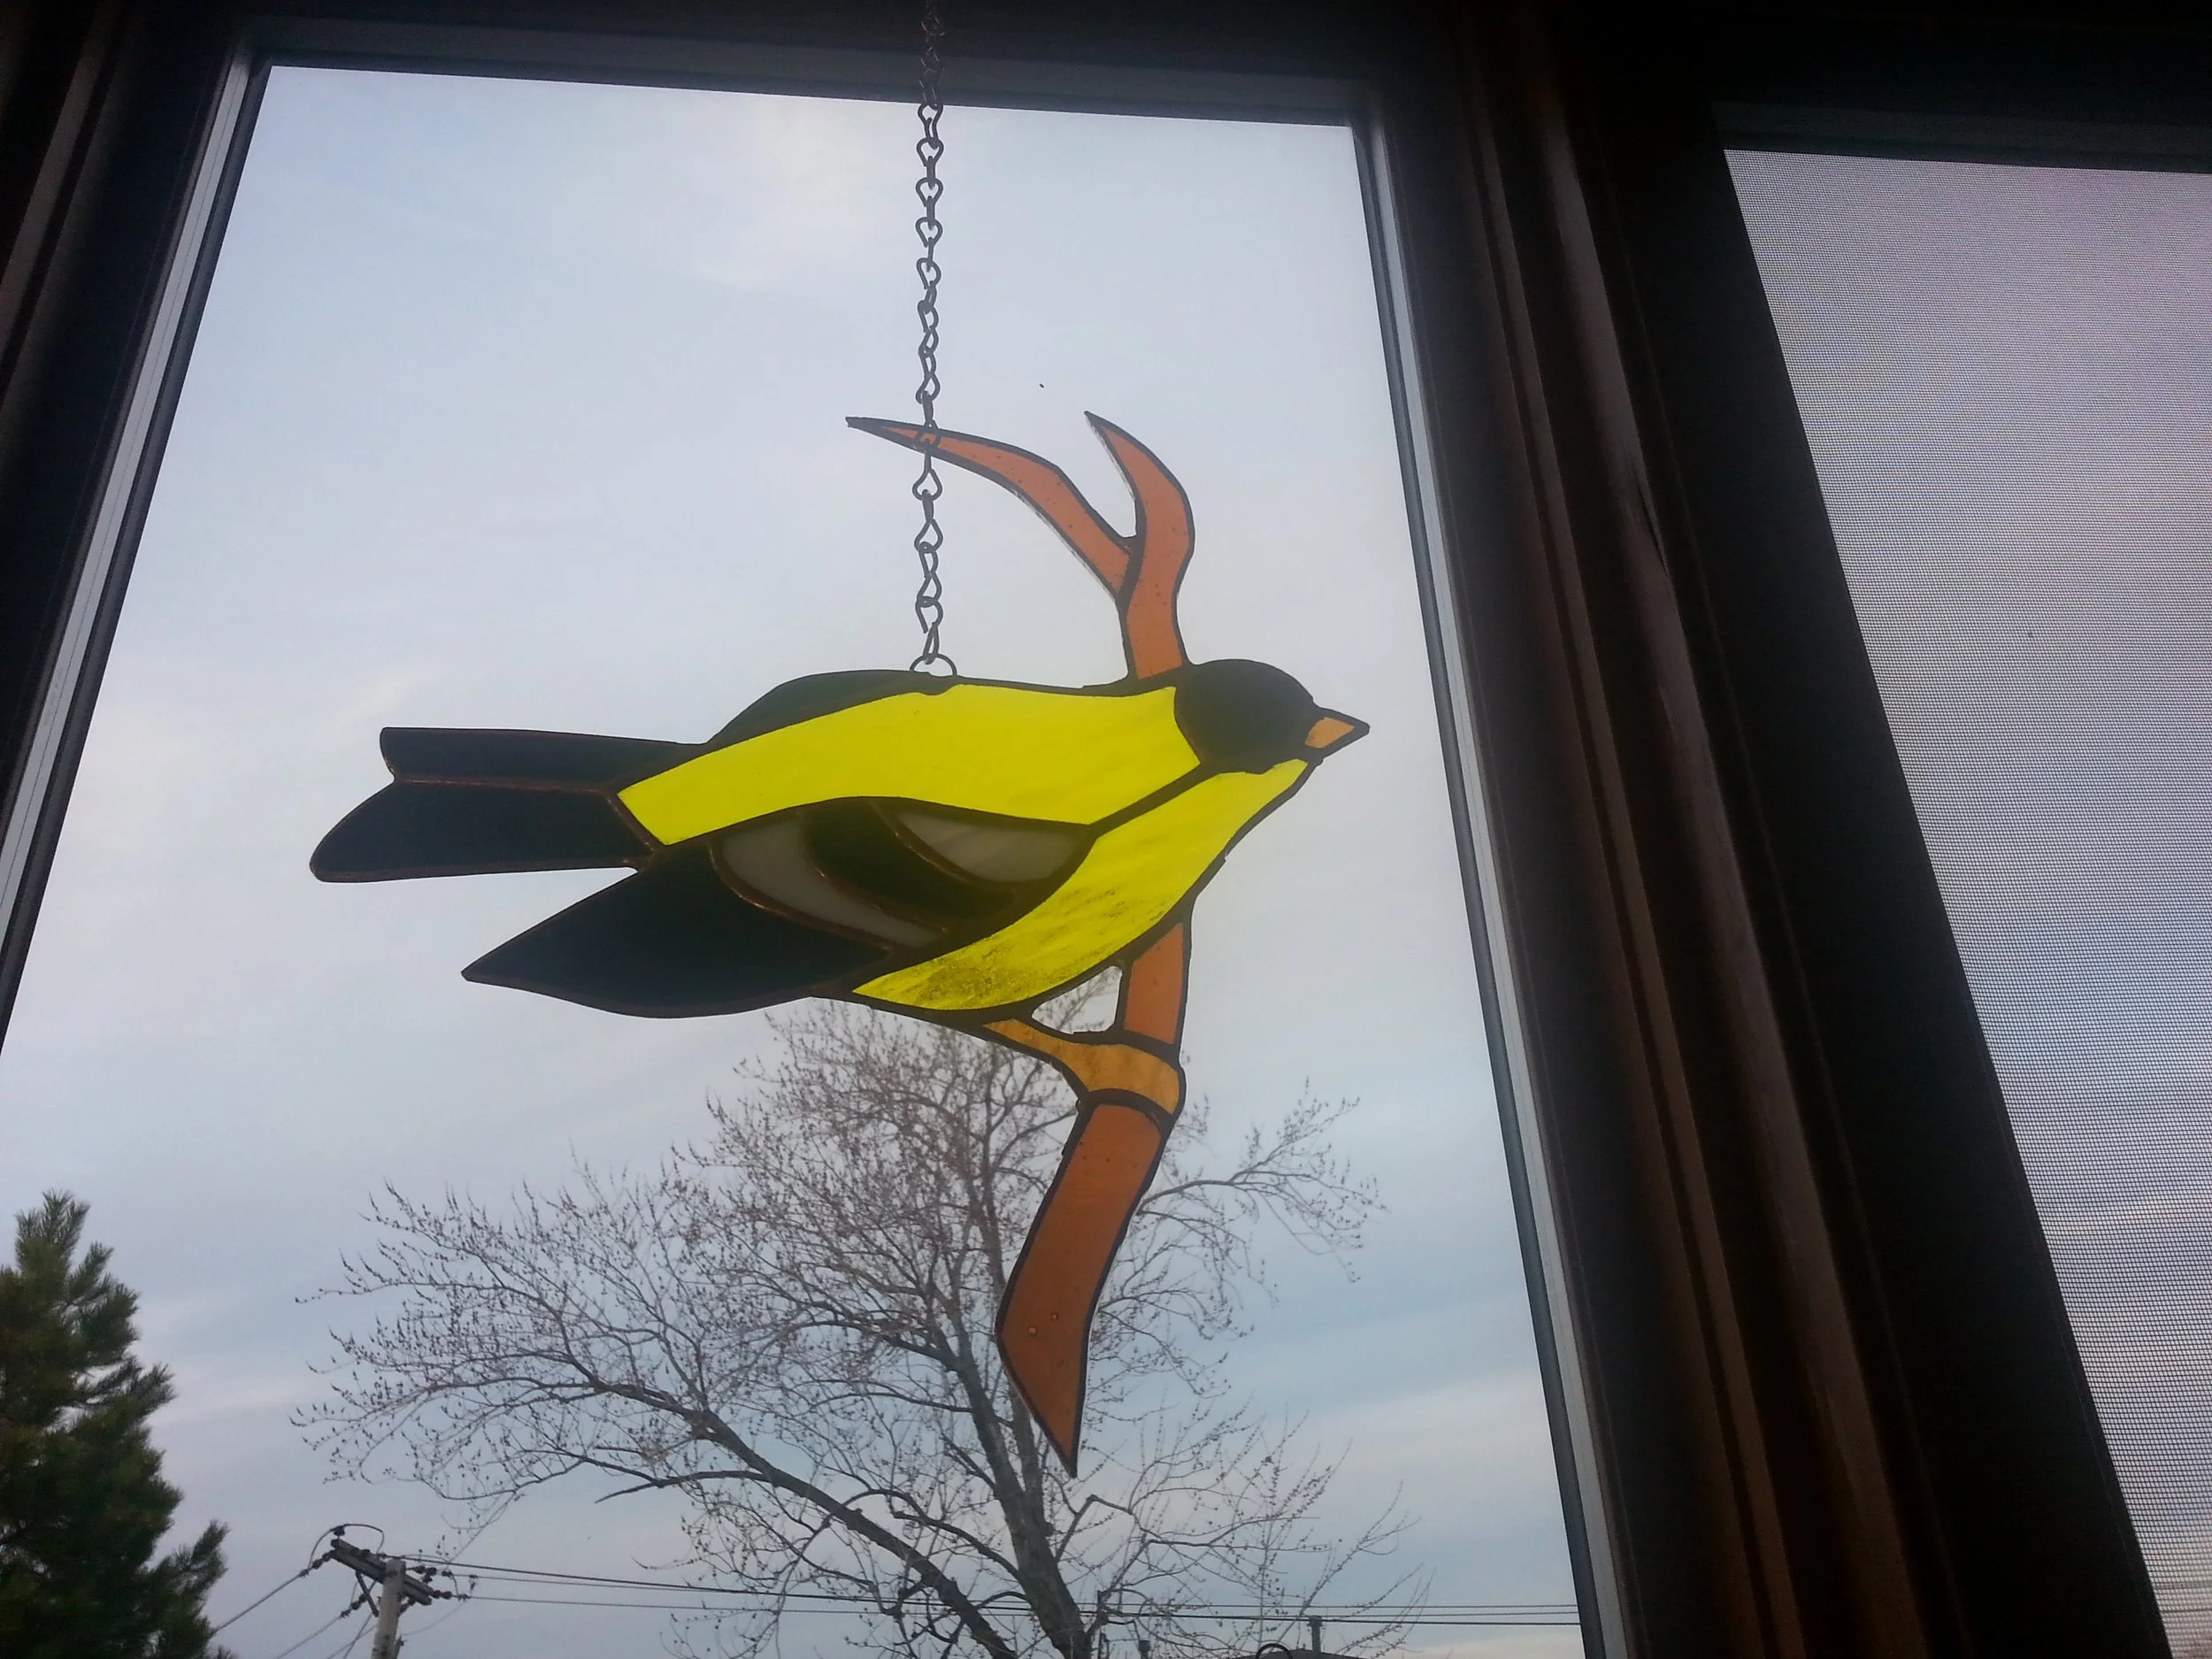
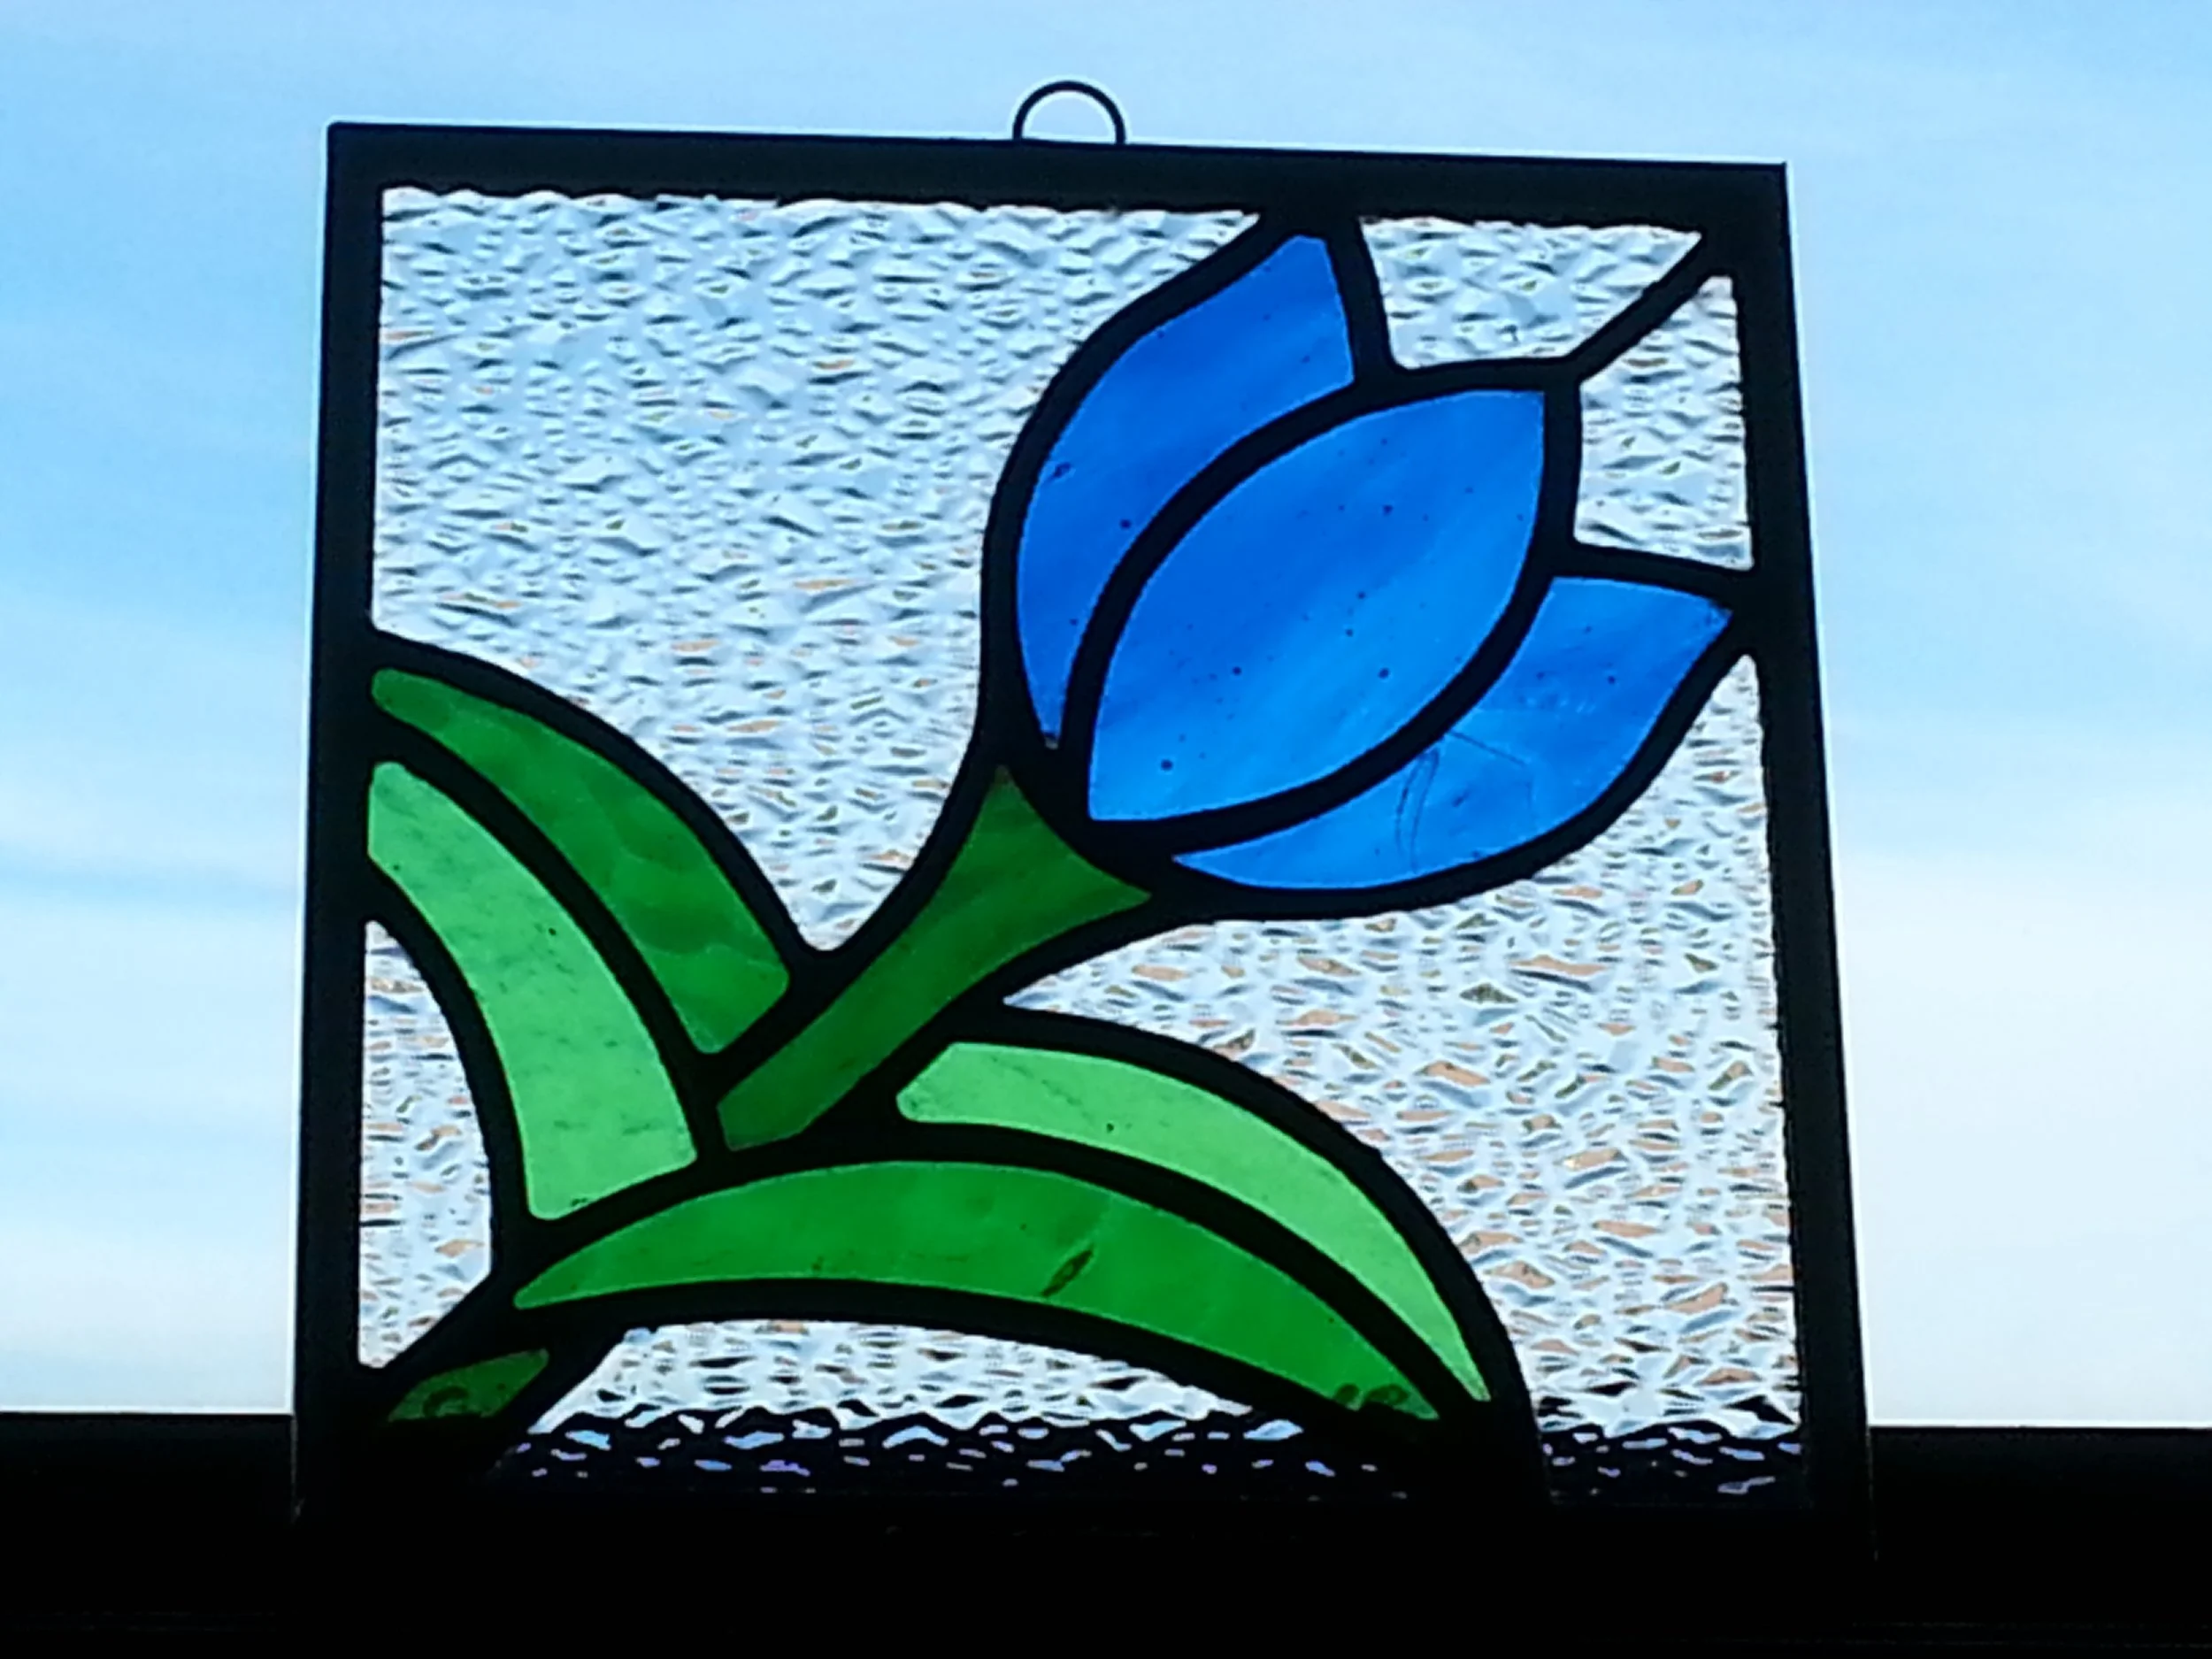
Two pieces from 2014: a goldfinch suncatcher made from an existing pattern and my tulip panel, one of my first designs where I began experimenting with textured clear glass to balance the colored elements.
In late 2014, I honored a request from a childhood friend to reconstruct a stained glass pattern from an existing window. I used the same methods I had developed for deriving patterns from photographs to ensure the scale and proportions were accurate. Later, I discovered the original source of that design—it appeared in The International Art Glass Catalogue. The issue was over a hundred years old!
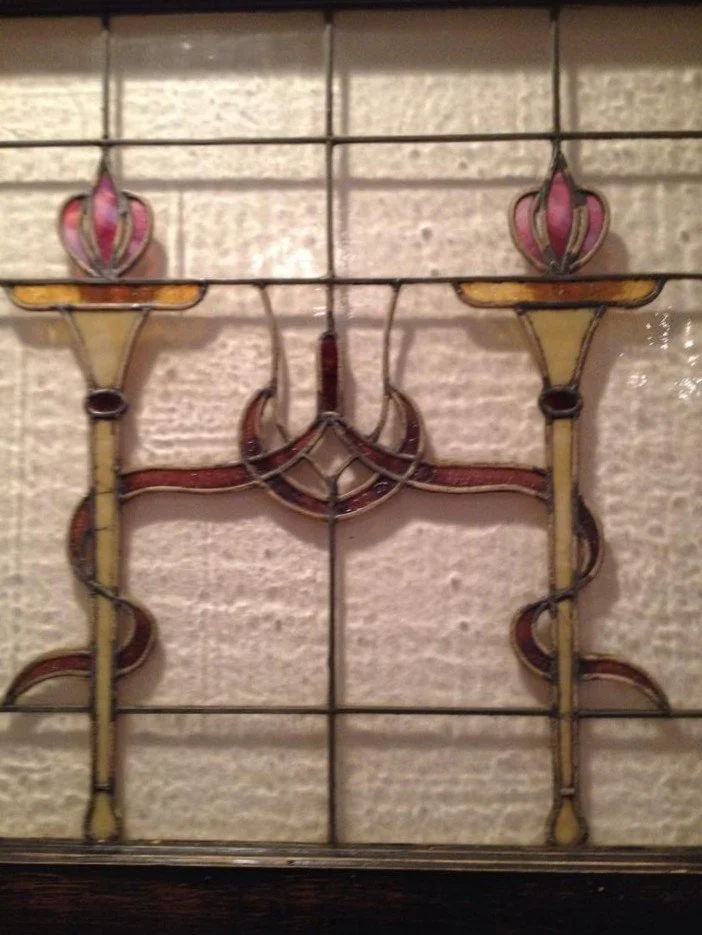
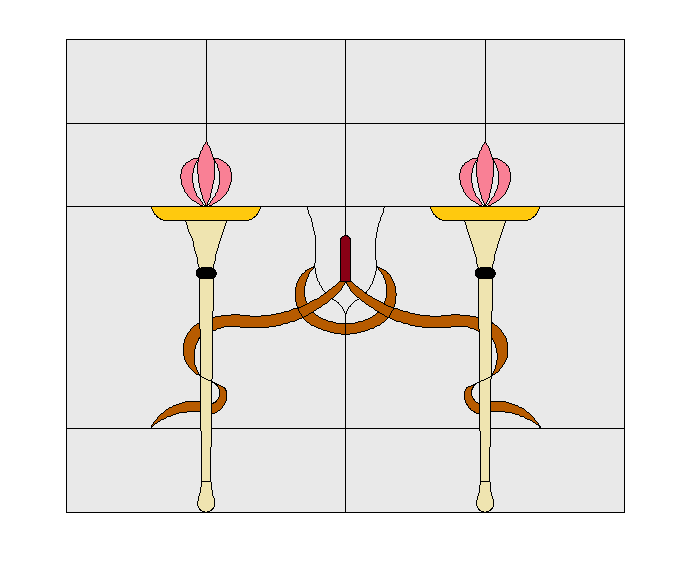
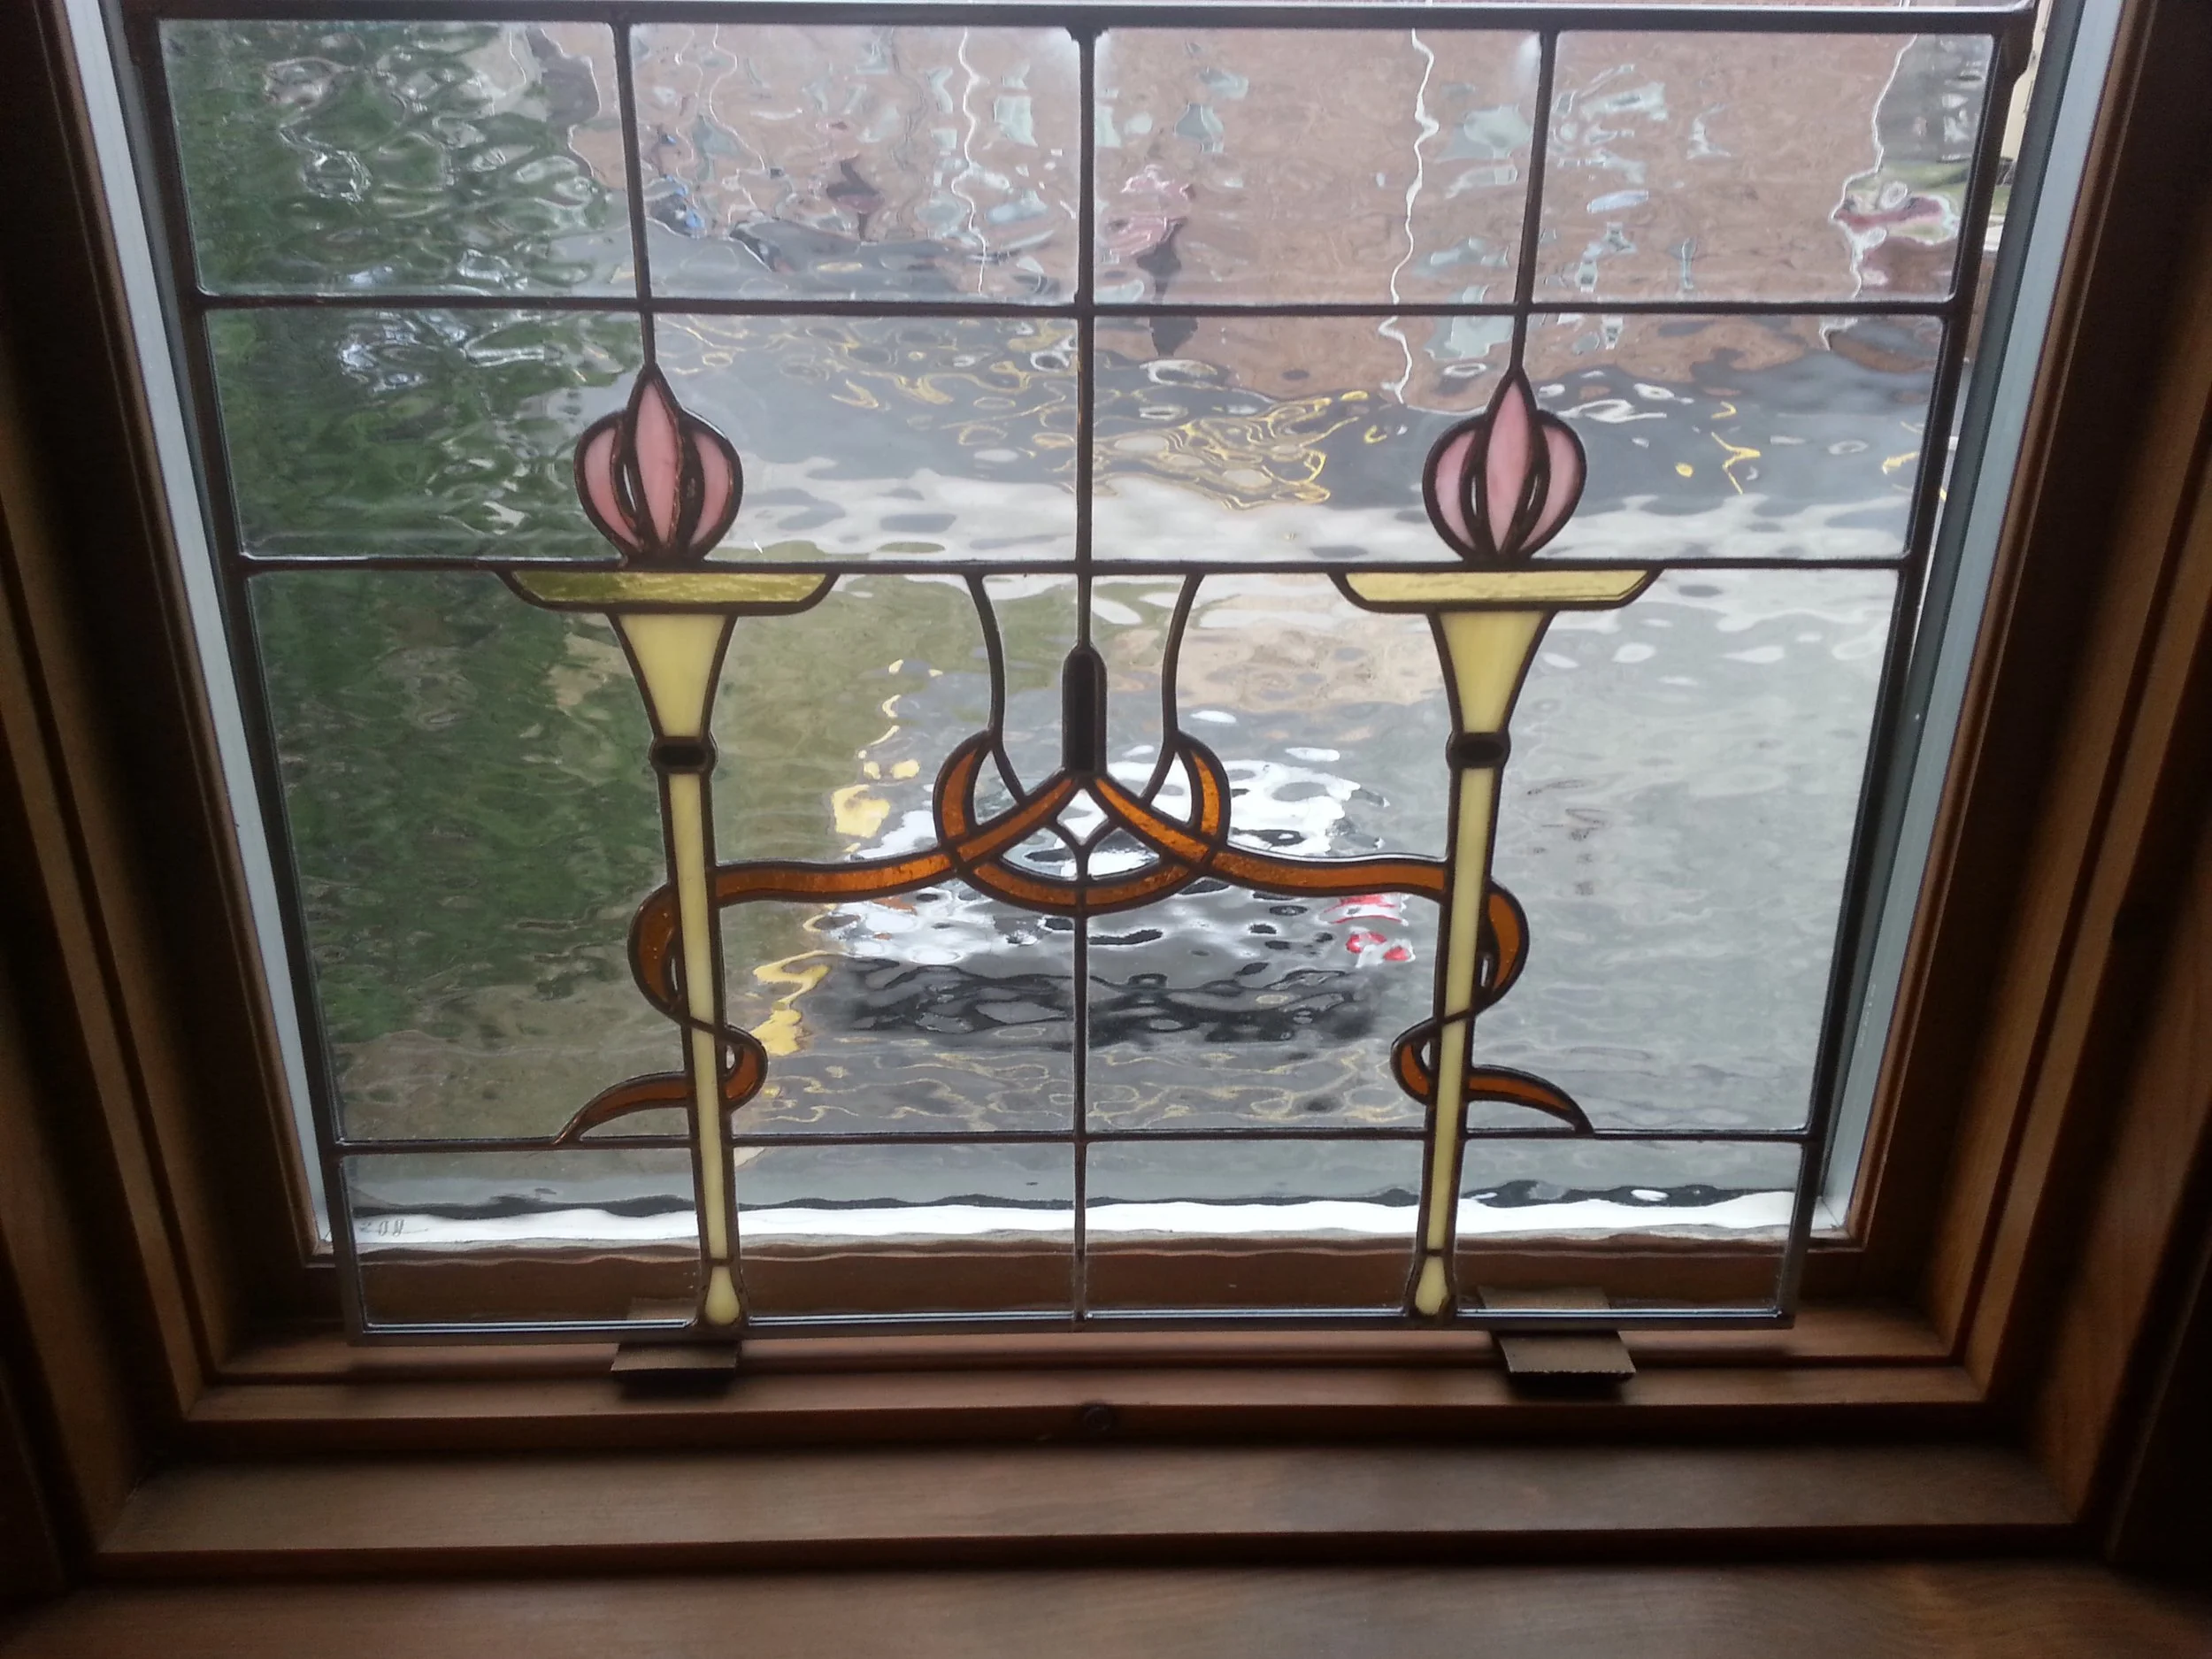
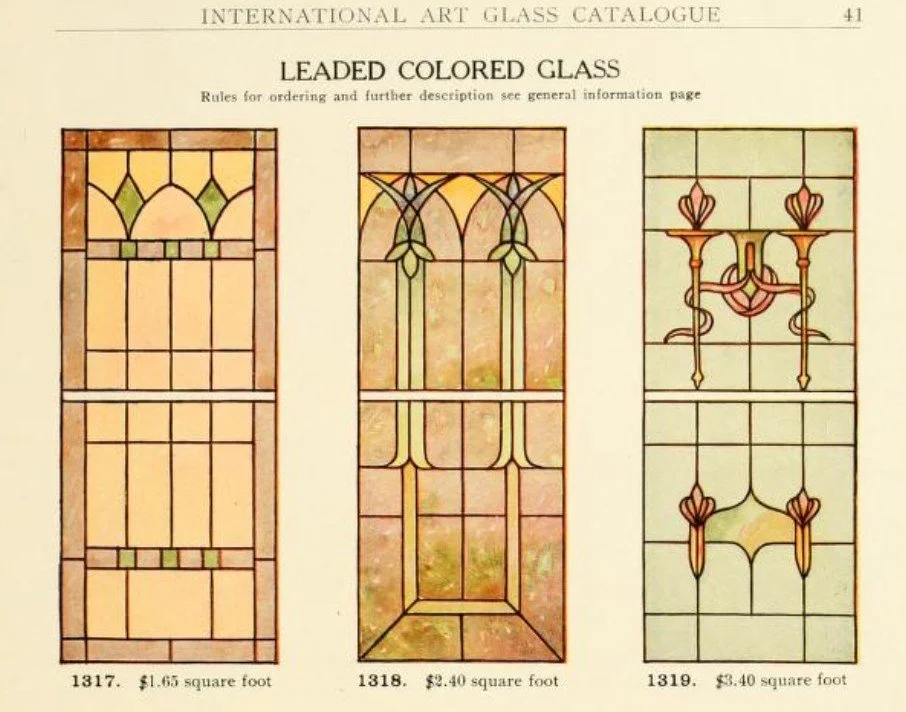
A small project recreating an existing panel for a childhood friend. I recreated the pattern from an existing stained glass window (top left), developing the design in CAD (top right) before rebuilding the panel myself (bottom left). Years later, I discovered the original source of the design in The International Art Glass Catalogue from over a century ago (bottom right).
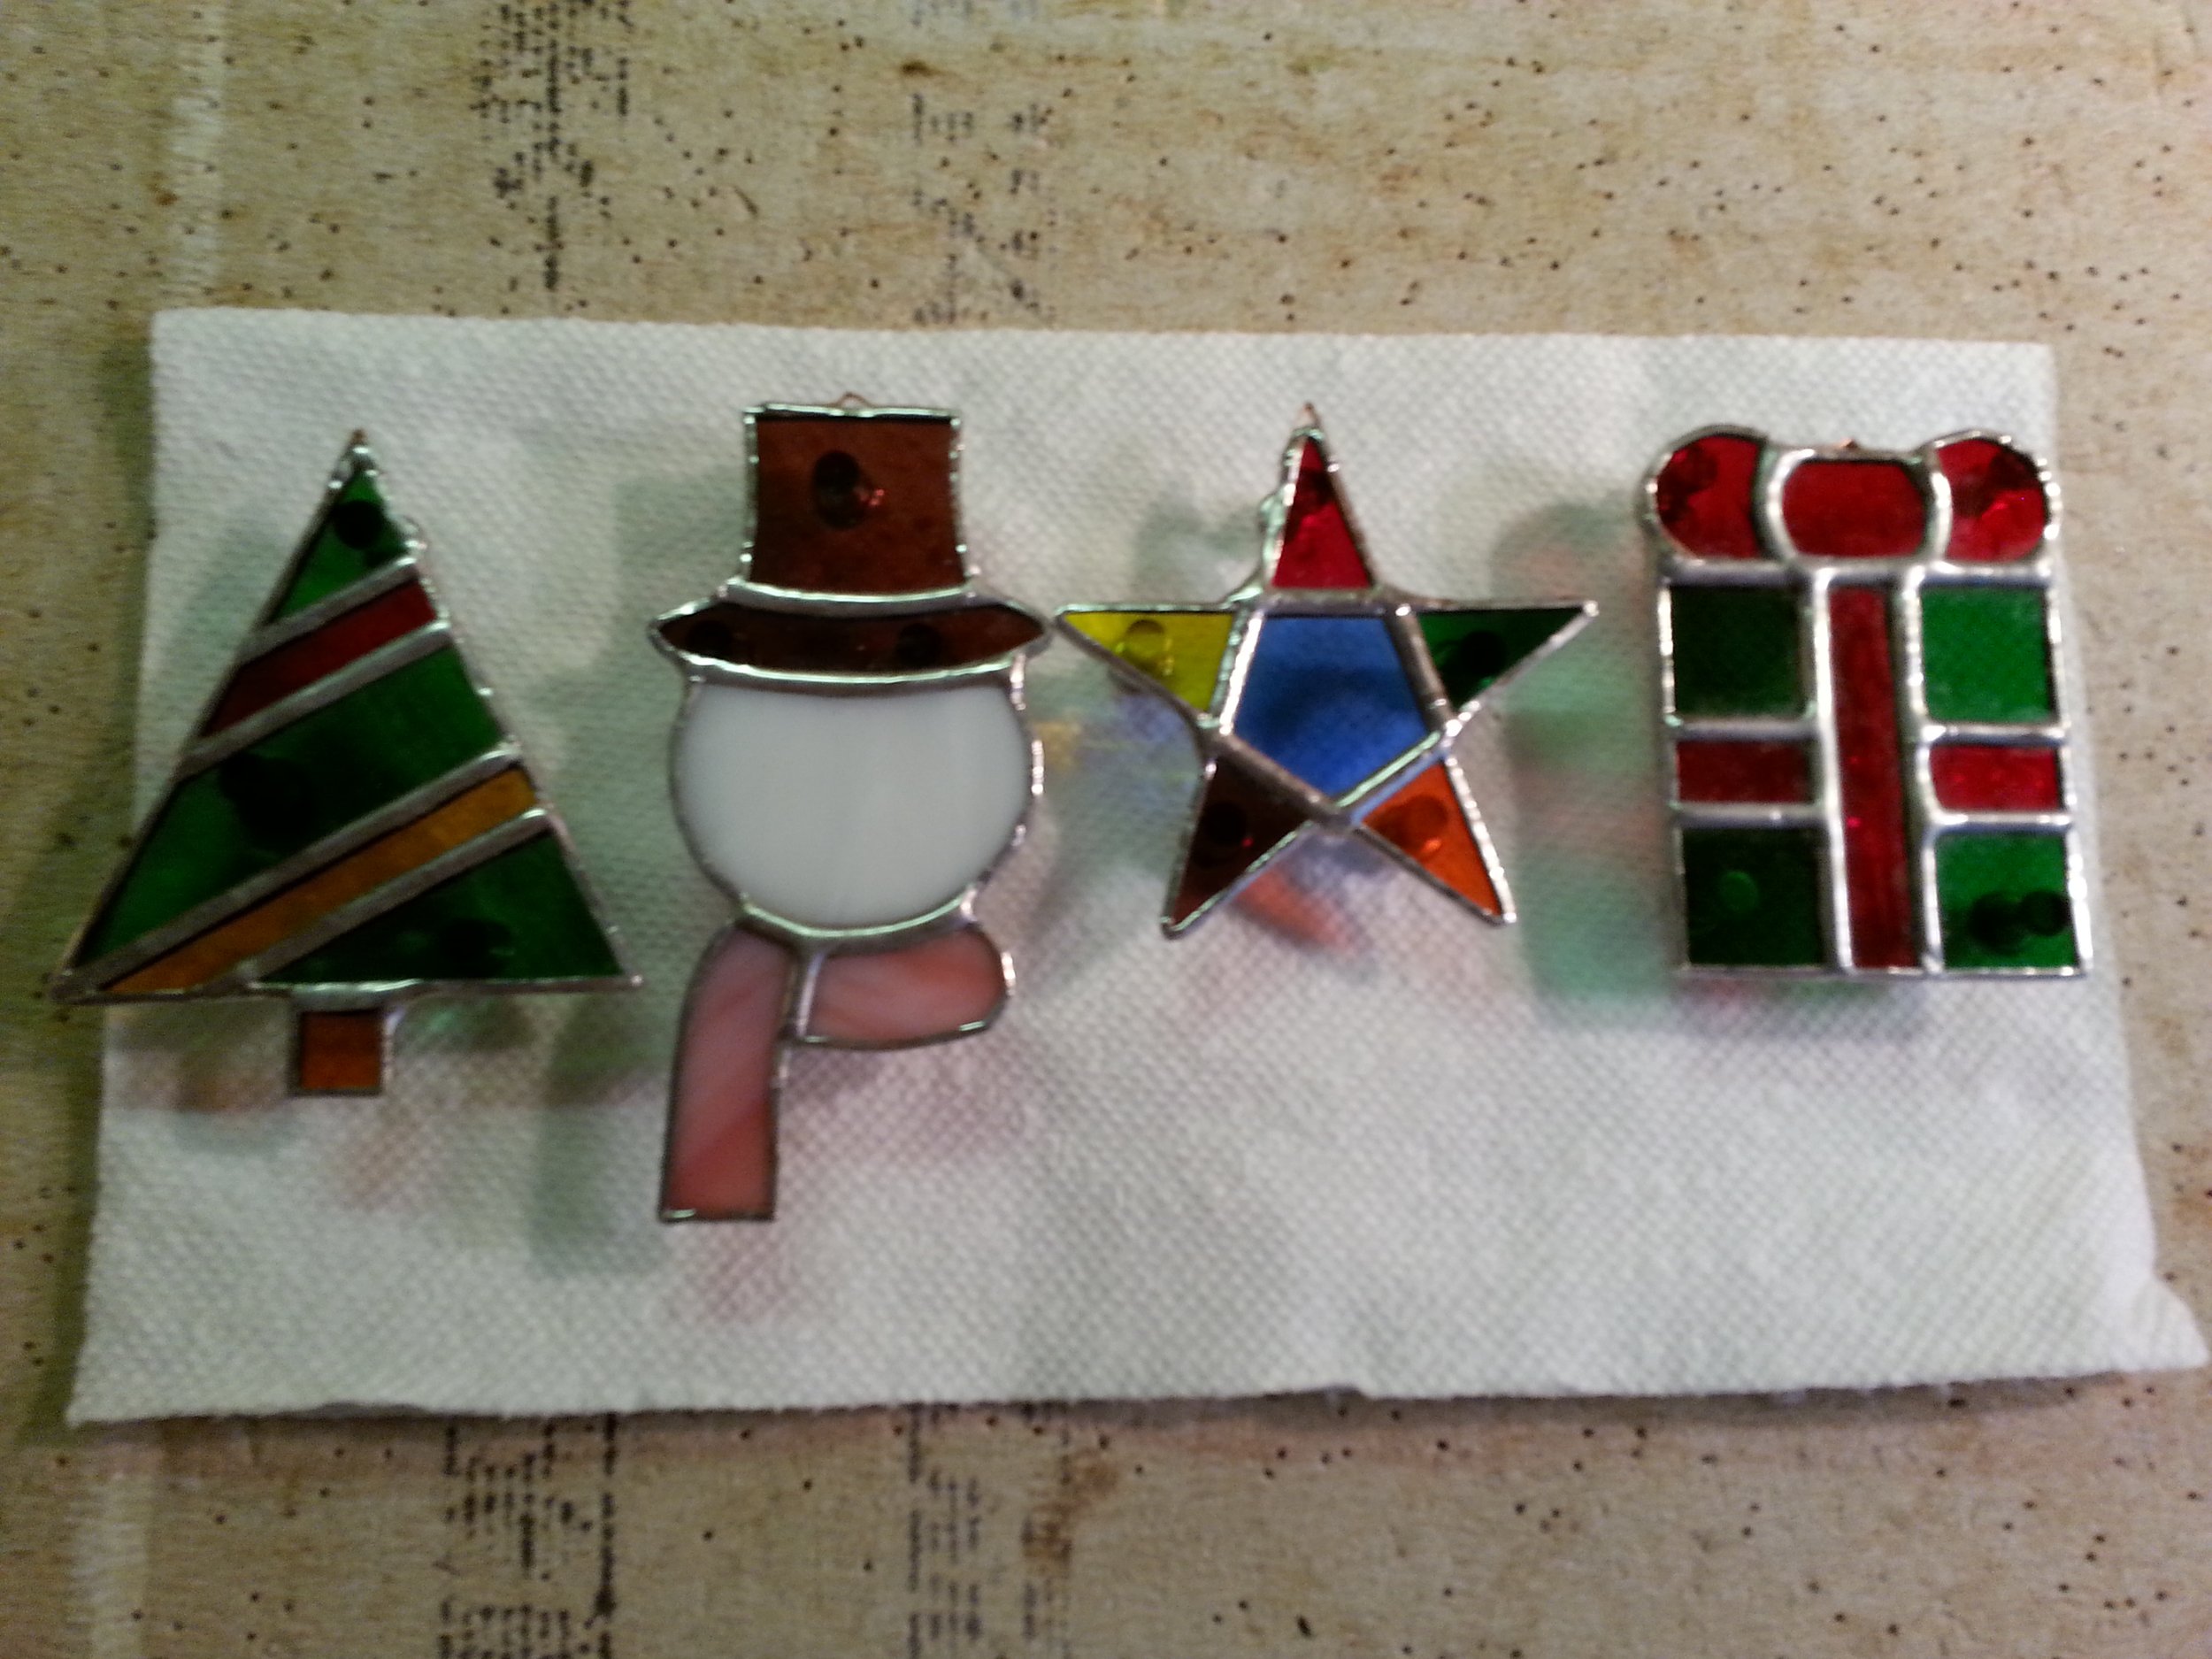
By 2015, I moved on to stained glass Christmas ornaments. Some of those patterns are available in the shop today.
2016-2019 – Stained Glass Intermission
By late 2016, waves of change were on the horizon. I moved in with the love of my life into a small condo in the northwest suburbs of Chicago that had no workshop space. Since it was on the opposite side of the city, I could no longer commute to a job I had held for twelve years, so I accepted a new opportunity.
When 2019 arrived, we had gotten married and decided to move to the Pittsburgh area. It felt like the right moment for a fresh start in many ways. I decided it was time to turn my stained glass hobby into a full-time business.
2019-Present – Rediscovery and the Evolution of the Business
After moving to a small town southeast of Pittsburgh, it seemed almost serendipitous that I had landed in a region with a strong glass-making heritage. Glass was a major industry here throughout much of the twentieth century. Today, only a few small operations remain, along with Youghiogheny Glass, makers of fine sheet glass. When I started Hallowed Oak Designs in late 2019, it felt fitting to make my own humble contribution to that heritage.
When I started this business, my initial plan was to make original stained glass suncatchers and panels using my own designs. That meant pushing myself creatively and testing my glass-cutting skills against patterns with increasingly complex curves. Nothing exemplified this new approach more than the Acorns and Oak Leaves pattern, which remains a flagship design today. It was the first pattern I created after emerging from my stained glass hiatus.
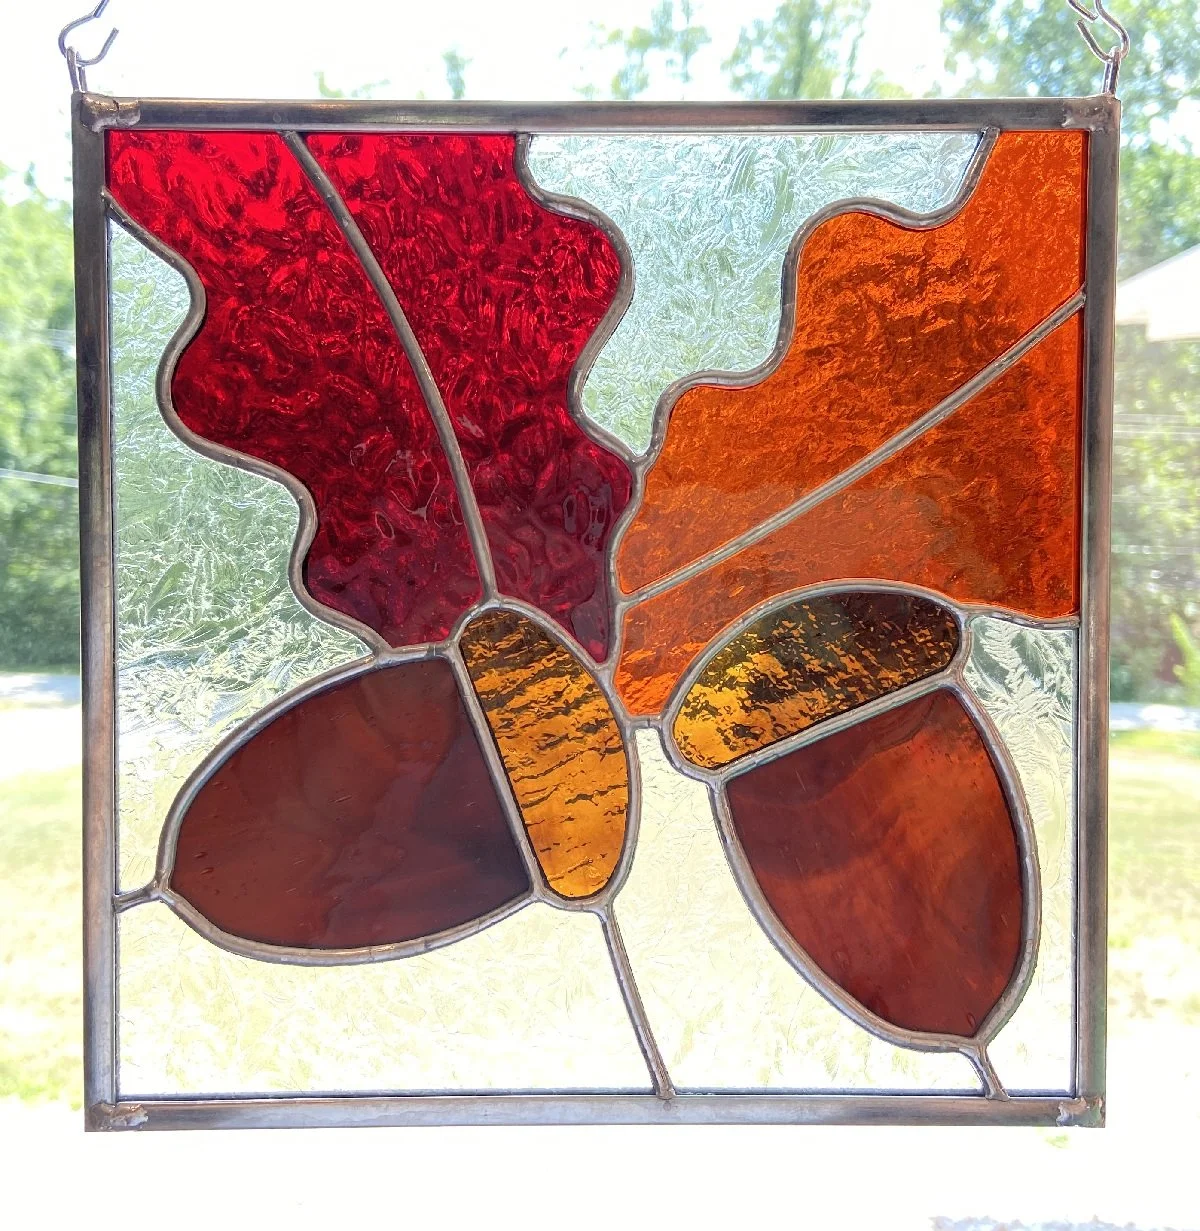
Acorns & Oak Leaves further expanded upon the natural curves and flowing lines first explored in my Tulip pattern from 2014. Notice the glass selection: bumpy textures for the acorn caps paired with a rich, smooth nut-brown glass for the body of the acorn.
Any stained glass artist will tell you that grinding glass can be a real grind. The fine adjustments, the risk of removing too much material—it can be tedious work. While working through this process, I had an idea that would save time. I began adding a 1.2 mm line weight or line width to my patterns in CAD so that they printed with bold, clearly defined lines. By cutting inside those lines, each piece automatically included a built-in solder gap.
At the time, I had no idea that pattern shears existed for this very purpose. By coincidence, the 1.2 mm line width I settled on fell almost perfectly between the typical gaps used for foil and lead pattern shears. I was merely printing out my patterns at different line widths until one looked right. To this day, I use this method and you can find them on my PDF patterns. Built-in gaps for the SVG varieties are included for a virtual pattern shear experience.
In January 2020, I developed the Prairie Style 2 Pattern. I designed Prairie Style 1 earlier but I never made a panel with it. Prairie Style 2 began as a way to use up scrap glass. My goal was to create a classic, antique-inspired design influenced by prairie-style architectural glass. I studied several historical panel designs—not to copy them, but to create my own rendition while still being true to the style.
The final design became something of a mission-style and prairie-style hybrid. In many ways, it came together instinctively. Just like any written work, many of my patterns had rough drafts and extensive edits, but this one developed quickly. It was well-balanced from the start—geometrically pleasing and proportionally grounded. I often describe it as feeling like “home”: warm and familiar, like an old house that feels welcoming the moment you step inside. To date, it remains my highest-selling pattern, with more than 370 copies sold and four physical versions produced in my shop.
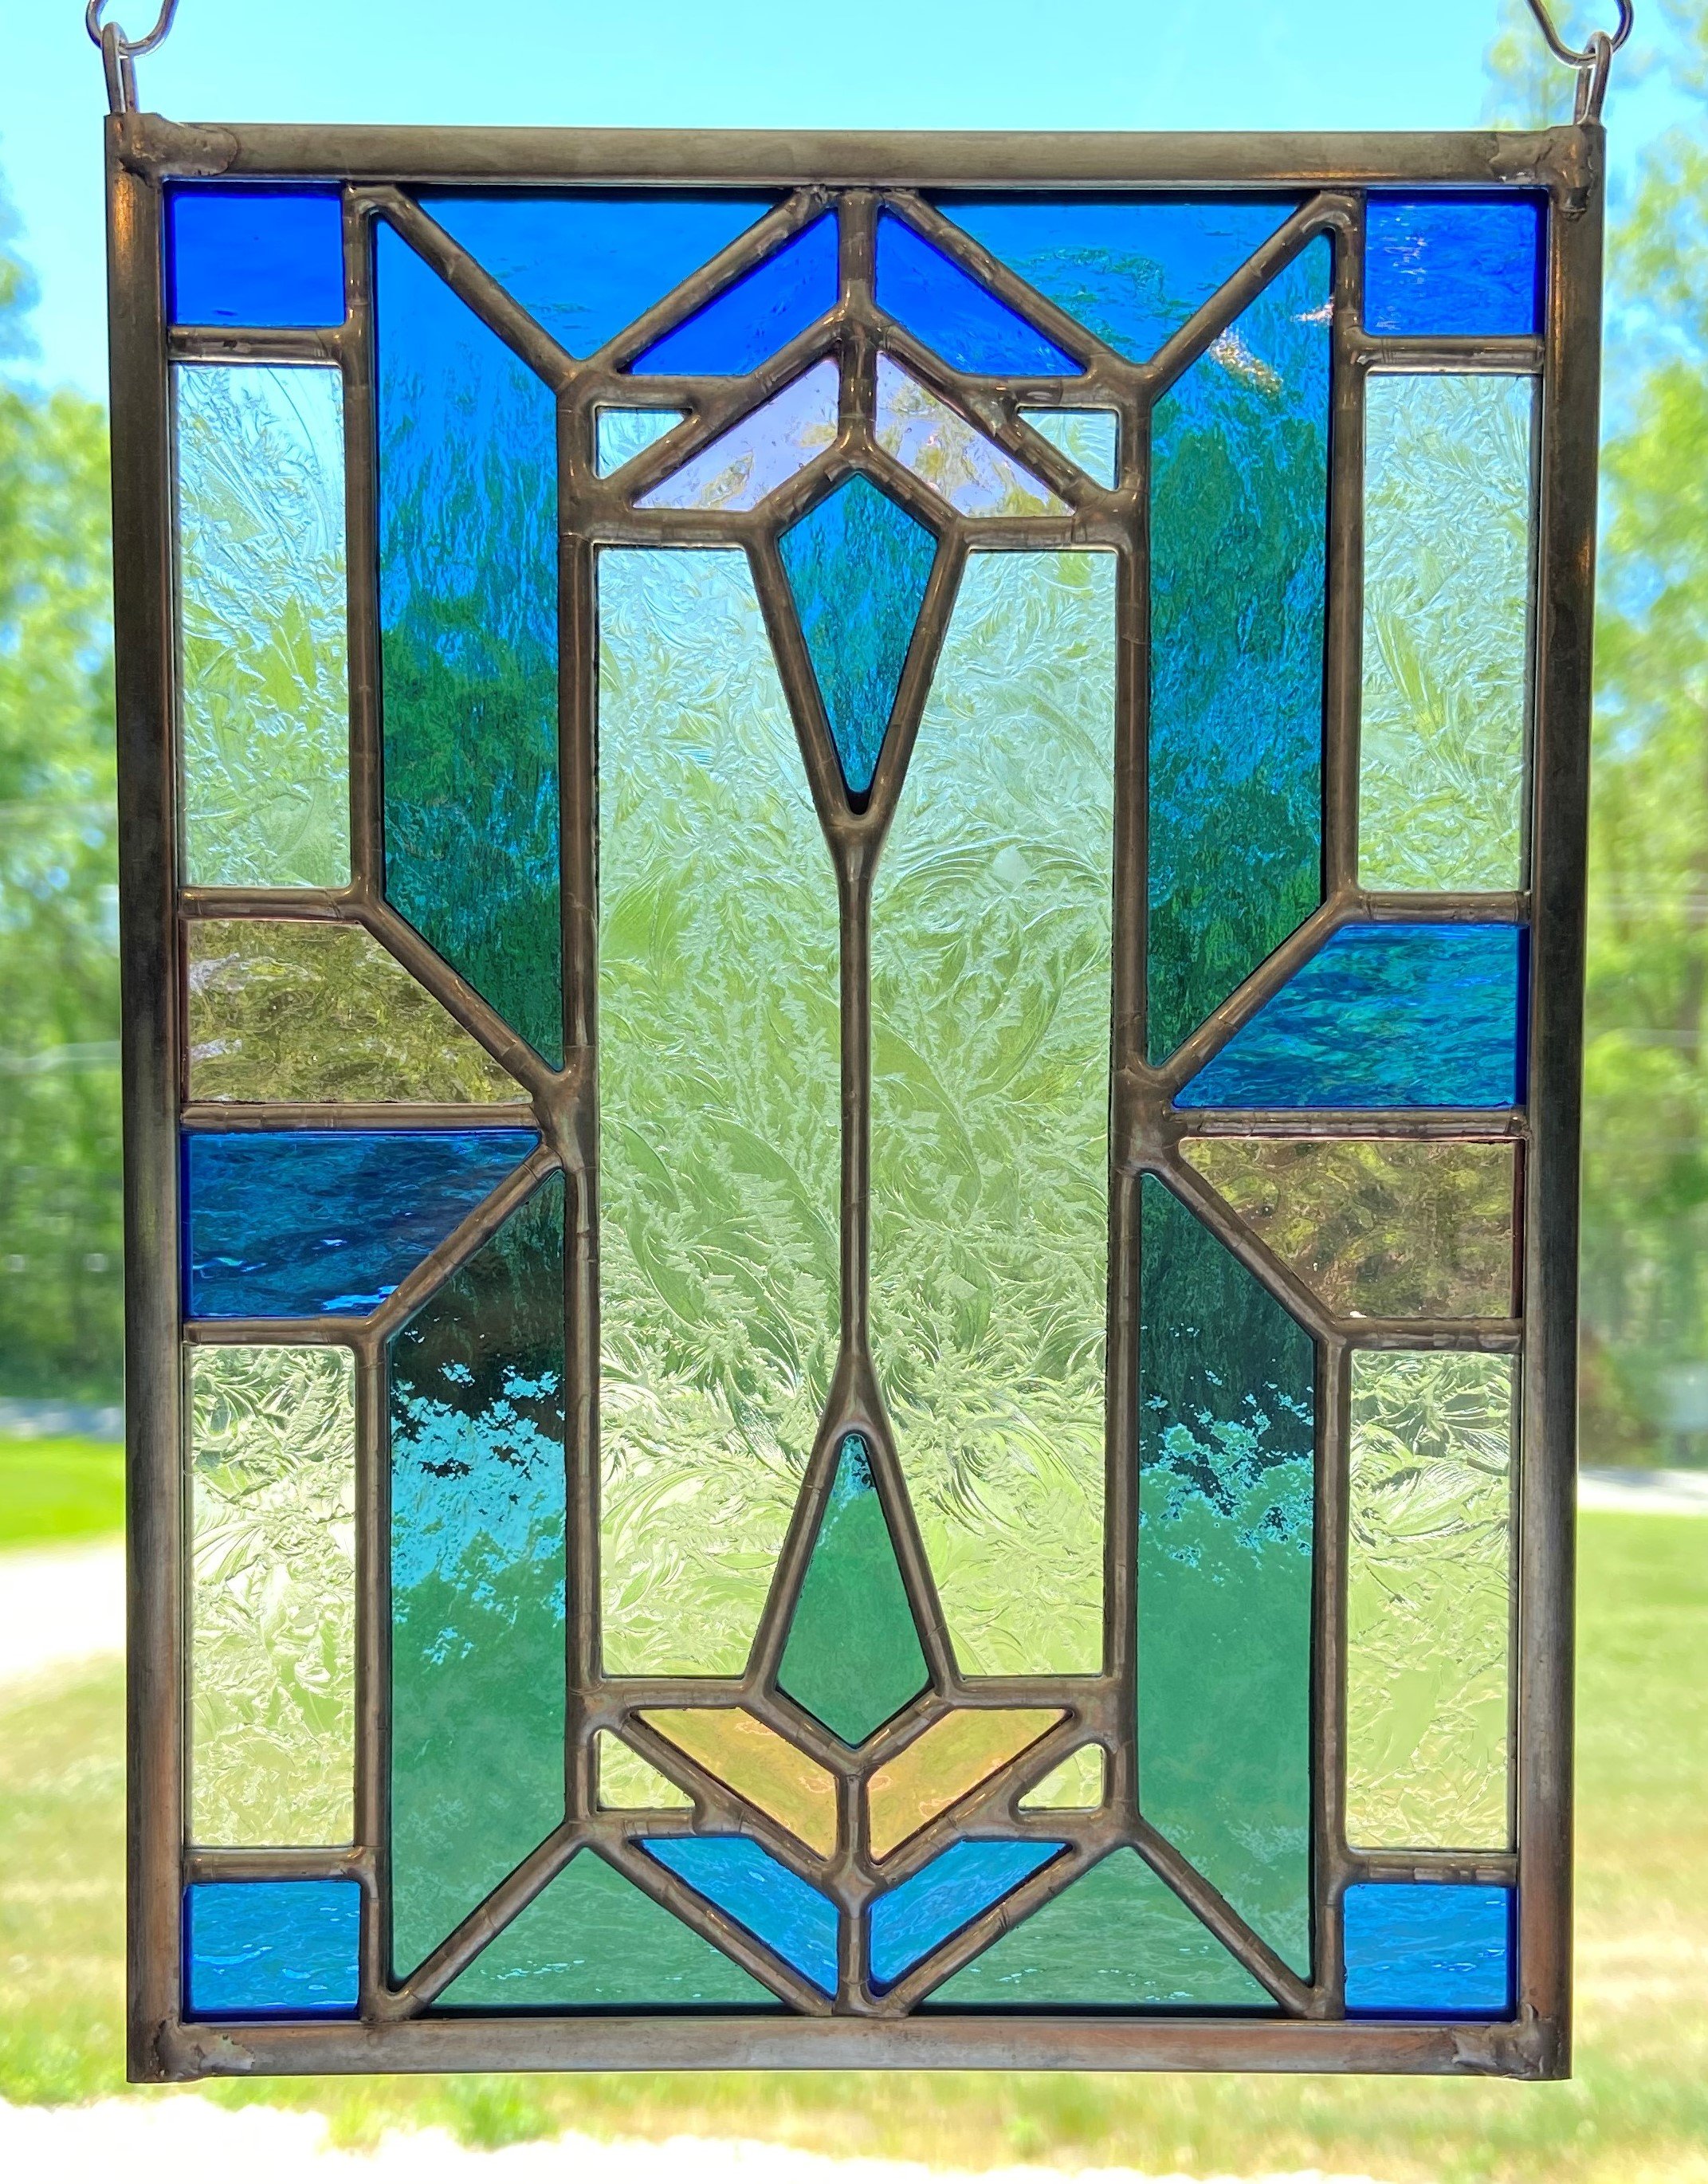
Prairie Style 2 Pattern
Historically, my shop has been something of a laboratory for experimentation. Over the years I have sold physical stained glass pieces, 3D-printed items, faux stained glass designs, and more than a thousand copies of my stained glass patterns. This period was heavy with experimentation and skill-building. As my confidence grew, so did my willingness to test new ideas—and not every pattern experiment succeeded. In fact, roughly half of my patterns have never literally seen the light of day.
In May 2022, making stained glass items had to take a back seat to work and home maintenance. The business was not yet in a position to support the repairs our home required, and I began preparing to return to a mechanical design role. For a time, the future of the business was uncertain. I couldn’t sell what I couldn’t physically produce.
But over the years I had developed dozens of patterns. Some were basic designs geared for beginners, others were examples of pure experimentation, and a few captured the design principles I cared most about—proportion, balance, and structure. I decided to begin offering those patterns as full-scale PDF downloads in the shop in lieu of physical offerings during that period.
Since then, I’ve spent many evenings refining those patterns—adjusting proportions, improving presentation, releasing new designs, and adding value wherever possible. That process eventually led to improved PDF formats and, more recently, SVG files for digital pattern use.
Today I’m once again dedicating myself to the business full time. For details on my next steps, you can read my previous post. I currently offer a limited selection of patterns for both beginners and experienced artists alike—patterns that are true to my overall design language.
There are many intricate and beautiful stained glass patterns across the internet that showcase extraordinary artistry. But for me, a successful pattern is not simply about complexity or decoration. The real question is this:
Does the pattern allow the glass to truly shine on its own, or is it overwhelmed by unnecessary detail?
Subscribe on Substack to receive new updates.